Spec-Driven Development in Action
Introduction
What if the most important skill for a developer was no longer writing code, but writing specifications? The traditional development cycle is a grind of boilerplate, configuration, and repetitive tasks. We spend more time on the "how" than perfecting the "what". But a new paradigm, powered by AI, is shifting that dynamic, and you can try it yourself right now.
I’m talking about specification-driven development, a workflow where the developer’s primary role is to create a detailed, machine-readable blueprint of an application. To prove it, I built a full-stack URL shortener. The vast majority of my time was spent crafting a perfect specification file; then an AI did the rest with a single command.
The Tools and the Paradigm
This experiment relies on a powerful combination of modern tools working in synergy:
-
Eclipse Che: A platform for providing Kubernetes-based Cloud Development Environments.
-
RA.Aid & Aider: A pair of open-source AI assistants, both licensed under the
Apache 2.0. RA.Aid is the master planner, taking a high-level spec and breaking it down into an implementation plan. Aider is the hands-on coder, executing the plan and modifying the code.
Together, they enable a shift where you, the developer, transition from a coder to an architect. Your focus is on high-level decisions, defining robust data models, crafting clean API contracts, and designing intuitive user interactions. The specification file becomes the single source of truth that drives the entire development process.
How to Replicate This: From Repo to Running App
You can follow these exact steps to see the process for yourself.
Step 1: The Blueprint Repo
Everything you need to start is in this GitHub repository: che-incubator/demo-spec-driven-development-with-ai
This repo contains the blueprint for our entire project.
It includes two crucial files: the spec.md,
which provides the detailed instructions for the AI, and
the devfile.yaml, which defines the Eclipse
Che workspace.
Step 2: Launch the Workspace with a Devfile
The devfile.yaml is the key to a one-click
setup. It tells Eclipse Che to create a workspace using a
pre-configured container image
(quay.io/che-incubator/cli-ai-tools:latest)
that already includes RA.Aid and
Aider. This means your development
environment comes ready with all the specialized AI tools
installed.
Step 3: Secure Your AI’s Access
To work, the AI assistants need access to a Large Language Model (LLM). RA.Aid and Aider are flexible and support many different providers, including Gemini, OpenAI, Anthropic, Groq, and more. For this demo, we’ll use the Gemini API.
The recommended way to provide credentials is by creating
a Kubernetes Secret. Eclipse Che will then
automatically mount this secret as an environment variable
inside your workspace. For the Gemini API, the required
environment variable is GEMINI_API_KEY.
You can create the secret for Gemini with the following command:
oc apply -f - <<EOF
kind: Secret
apiVersion: v1
metadata:
  name: gemini-api-key
  labels:
    controller.devfile.io/mount-to-devworkspace: 'true'
    controller.devfile.io/watch-secret: 'true'
  annotations:
    controller.devfile.io/mount-as: env
data:
  GEMINI_API_KEY: [base64 encoded Gemini API key]
type: Opaque
EOF
If you prefer to use a different provider, simply consult
the RA.Aid or
Aider documentation for the correct
environment variable name (e.g.,
OPENAI_API_KEY) and adapt the secret
accordingly.
Step 4: Unleash the AI
Once you have crafted the spec.md for the
application of your dreams, all it takes is this one
command in the terminal to set the AI to work:
ra-aid --use-aider --cowboy-mode --show-cost --track-cost --msg-file spec.md
This command tells RA.Aid to use your
spec.md file as its guide, leverage
Aider for code modifications, and run
autonomously without needing interactive approval
(--cowboy-mode).
Instantly, the agent will parse the specification and begin building the application right inside your Eclipse Che workspace, just as it did for my URL shortener. See the whole process unfold in the video below.
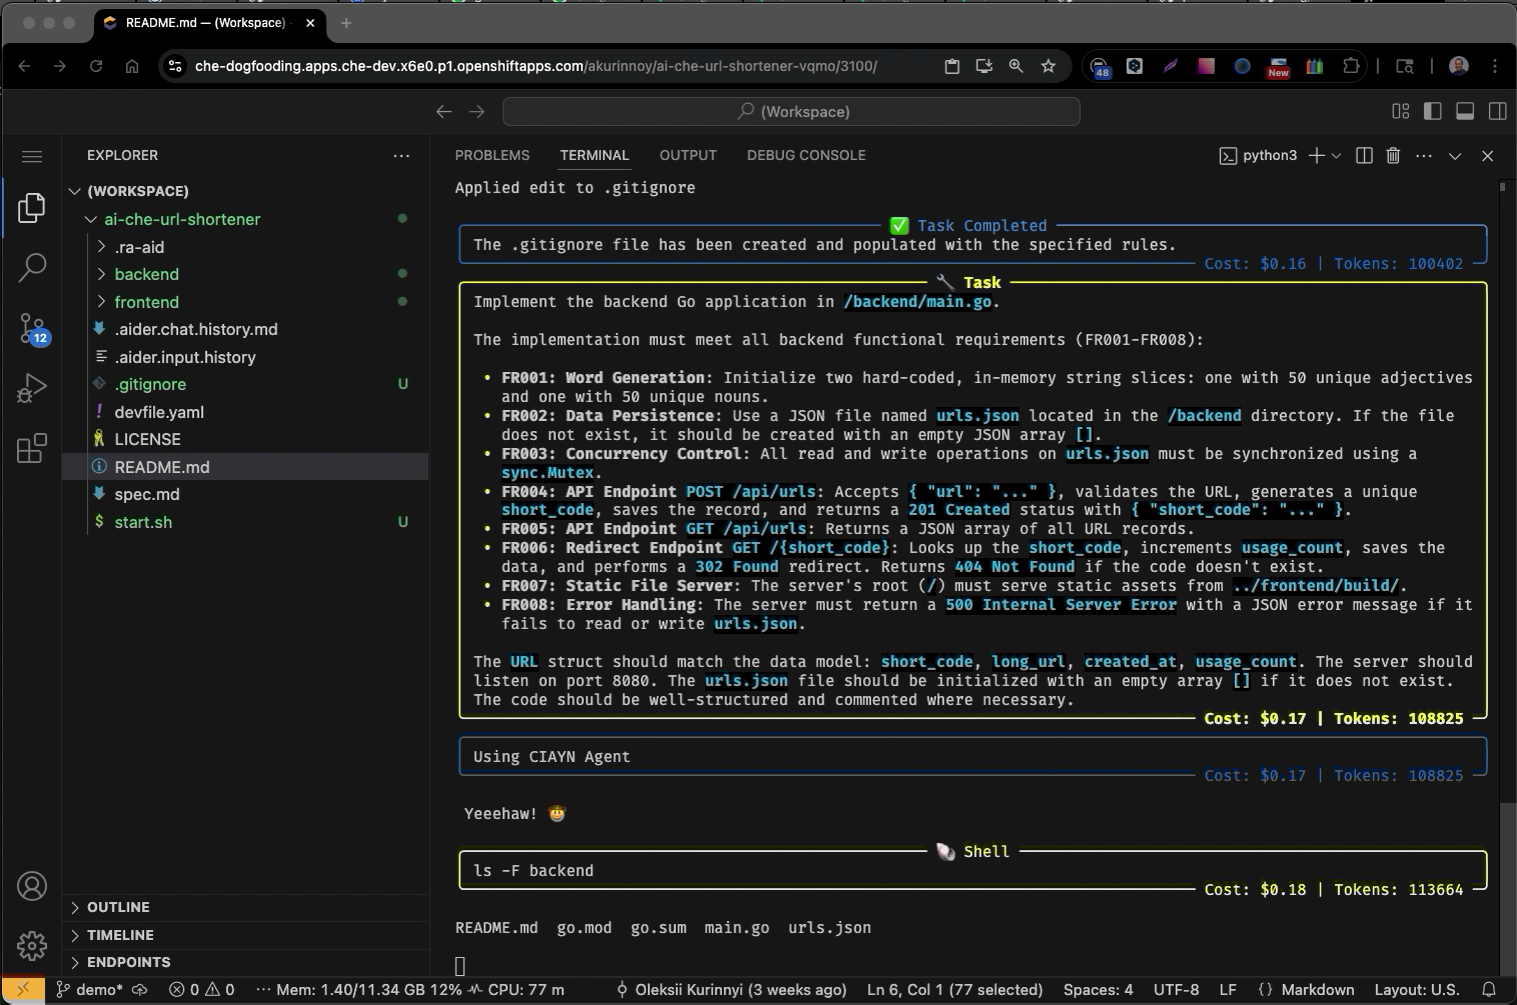
As the agent works, you can follow its progress directly in the terminal. The output shows its step-by-step thinking process as it interprets the specification, plans its actions, and executes them.

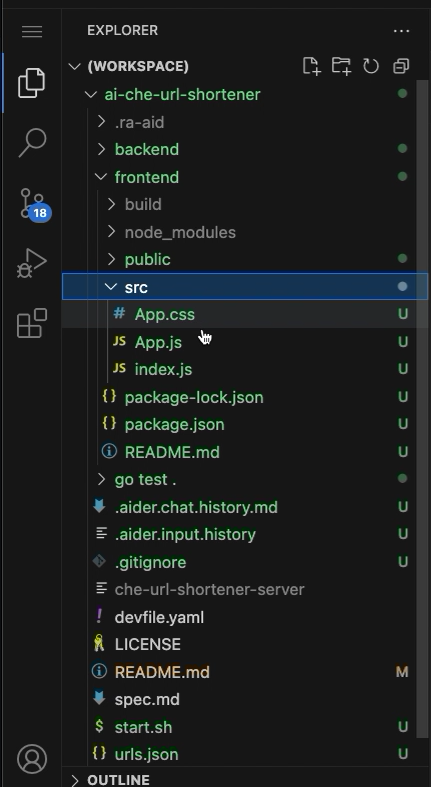
It will generate the backend, the frontend, and any necessary scripts. You can see the complete, well-structured project created by the AI in the file explorer.

Step 5: Working Application
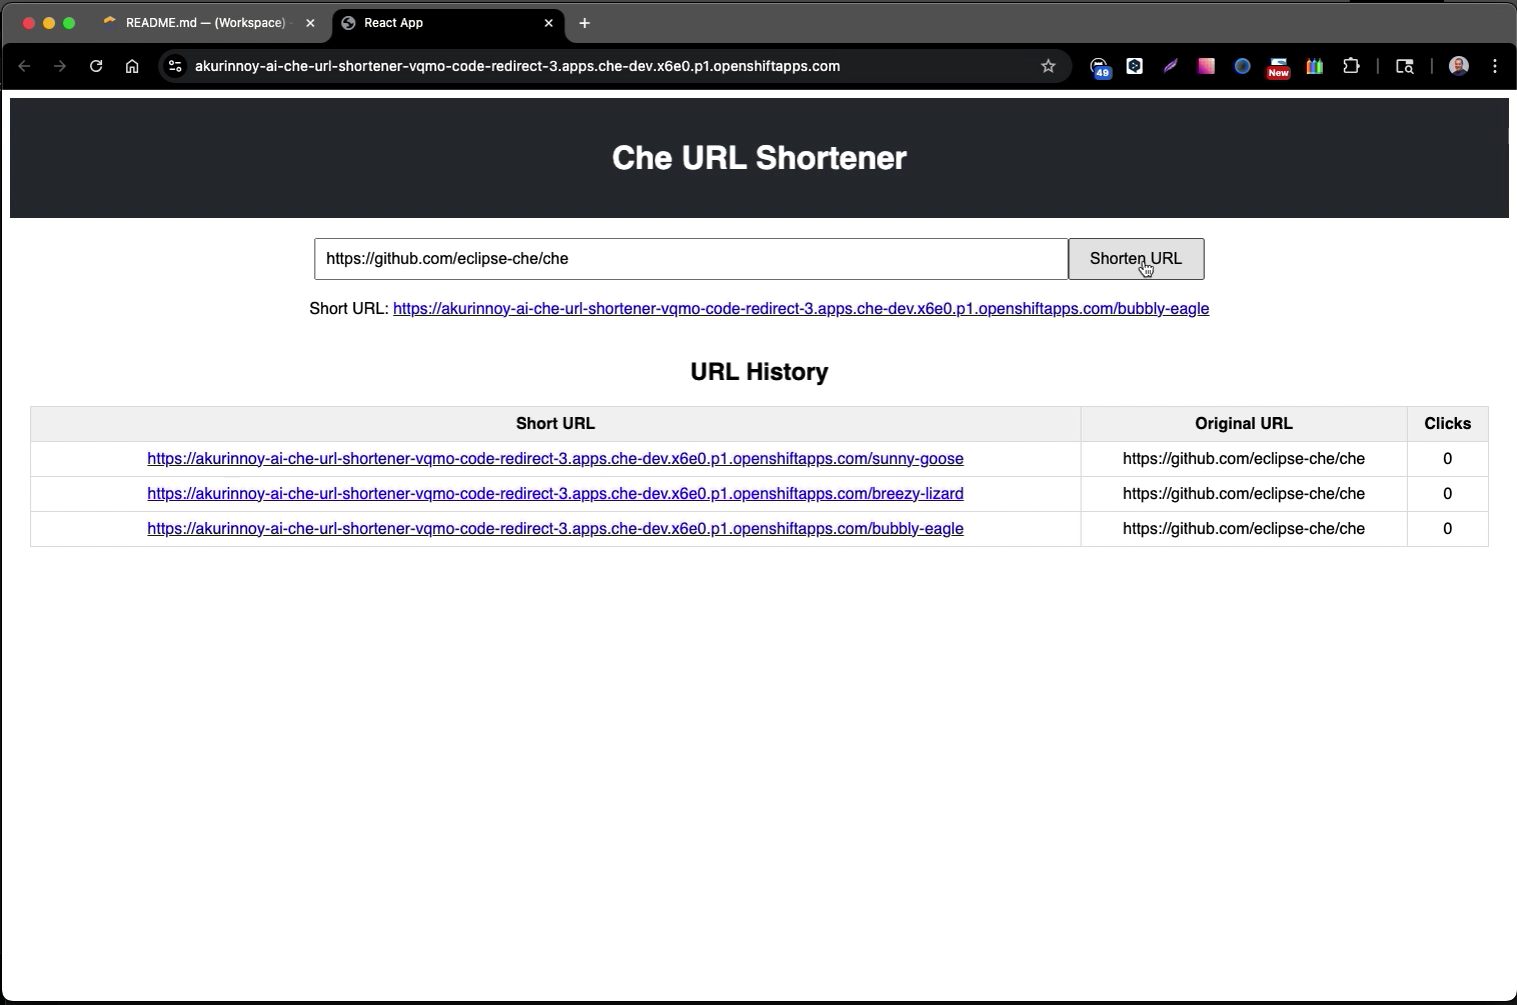
Writing a detailed specification requires deep thought, but that upfront investment pays off massively by automating the hours of coding and debugging. After the agent finishes, you have a fully working application.
|
Note
|
While the demo environment’s hostname makes the full URL long, the AI correctly built the core feature: generating a short, clean, and predictable path for any link you provide. |

Conclusion
This demonstration is more than just a new way to build a URL shortener; it’s a glimpse into the future of our profession. The rise of capable AI assistants marks a fundamental shift in the developer’s workflow, moving us away from the manual, line-by-line construction of applications and toward a new paradigm where we act as architects. Our primary role is evolving to be the designers of robust systems, the authors of clear specifications, and the strategic thinkers who guide AI tools to execute a vision.
Spec-driven development is likely just one step on a path of rapid transformation. The world of AI in software engineering is changing fast, and the tools we use tomorrow will be even more powerful.
The best way to understand this shift is to experience it firsthand. I encourage you to run the demo yourself and reflect on how this technology could change your own work. The conversation is no longer about whether AI will write code, but about how we will guide it to build better software.