Using Keycloak as an External Identity Provider for Eclipse Che on OpenShift
Starting with OpenShift 4.20, administrators can configure external OIDC identity providers for direct authentication to bypass the built-in OAuth server and use the external identity provider directly. This enables direct integration with an external OIDC provider, allowing you to use its advanced capabilities beyond the built-in OAuth server.
Eclipse Che now fully supports this setup: you can deploy Che on an OpenShift cluster that authenticates users through an external Keycloak instance, for example. In this post, we walk through the end-to-end configuration.
Step-by-Step Configuration
-
Keycloak is deployed and configured as an external identity provider for OpenShift.
-
You have cluster administrator access.
-
You have
ocCLI installed and authenticated.
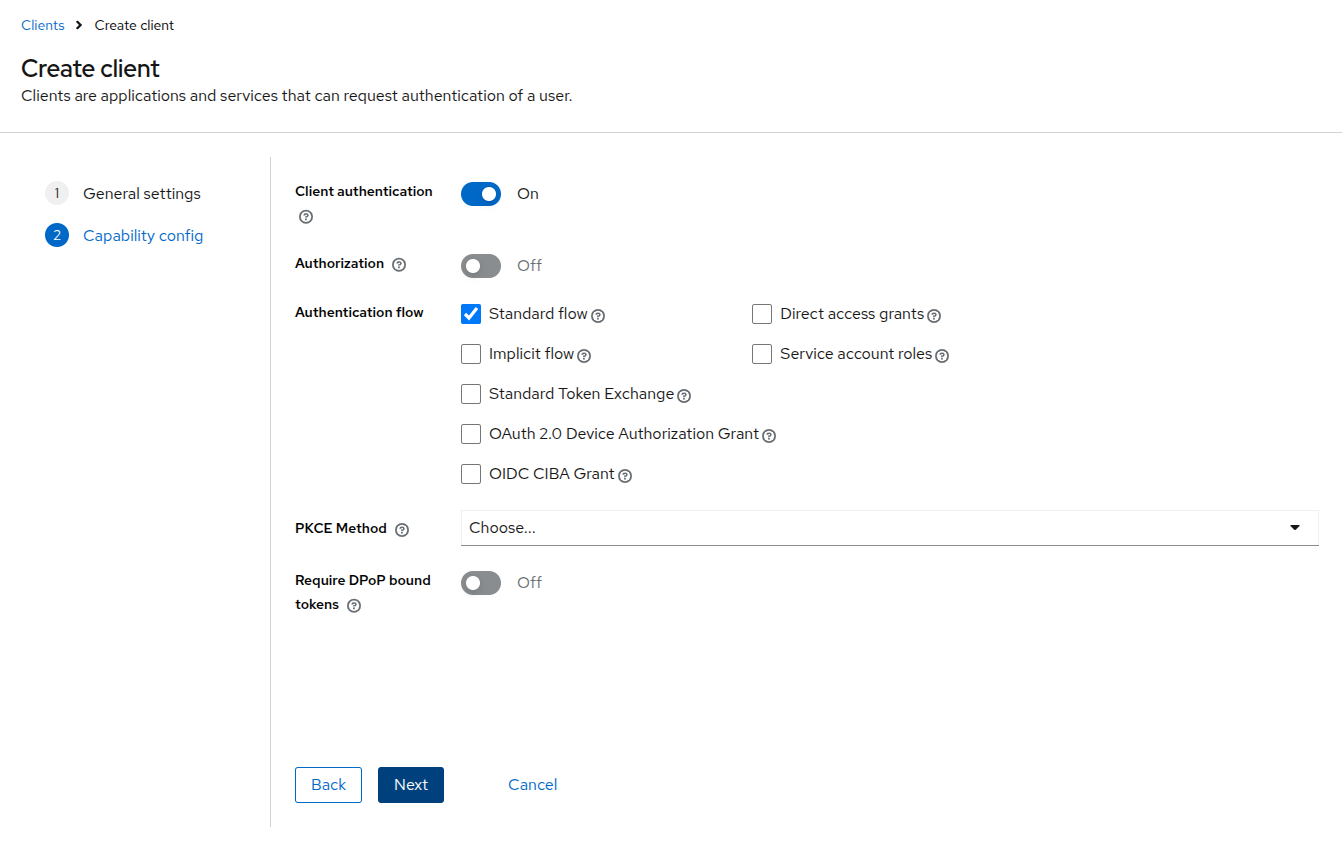
1. Create the Eclipse Che Client in Keycloak
In the Keycloak Admin Console, create a new client for Eclipse Che:
-
Navigate to your OpenShift realm and select Clients.
-
Click Create client.
-
Set the Client ID to
eclipse-che. -
On the Capability config page, toggle Client authentication to On.
-
Save the client and copy the Client secret from the Credentials tab.
|
Note
|
You configure the redirect URI after deploying Eclipse Che (Step 7). |
2. Register the Client as an Audience
Add the eclipse-che client to the audiences
list in the OpenShift authentication configuration:
oc patch authentication.config/cluster \
  --type='json' \
  -p='[
    {
      "op": "add",
      "path": "/spec/oidcProviders/0/issuer/audiences/-",
      "value": "eclipse-che"
    }
  ]'
Then wait for the kube-apiserver to roll out
the changes:
watch oc get co kube-apiserver
3. Create the eclipse-che Namespace
oc create namespace eclipse-che4. Create the OAuth Secret
oc apply -f - <<EOF
apiVersion: v1
kind: Secret
metadata:
  name: oauth-secret
  namespace: eclipse-che
  labels:
    app.kubernetes.io/part-of: che.eclipse.org
stringData:
  oAuthSecret: <CLIENT_SECRET>
EOF
Replace <CLIENT_SECRET> with the value copied from the Keycloak Credentials tab.
5. Import the Keycloak CA Certificate
Create a ConfigMap containing the Keycloak server’s CA certificate, so that Eclipse Che can trust the Keycloak endpoint.
Extract the CA certificate from the Keycloak server:
openssl s_client \
  -connect "$(echo "$KEYCLOAK_URL" | sed 's|https://||'):443" \
  -showcerts < /dev/null \
  | sed -n '/-----BEGIN CERTIFICATE-----/,/-----END CERTIFICATE-----/p' \
  > keycloak-ca.crt
Create a ConfigMap from the extracted certificate:
oc create configmap keycloak-certs \
  --from-file=keycloak-ca.crt=keycloak-ca.crt \
  -n eclipse-che
Label the ConfigMap so that Eclipse Che recognizes it as a trusted CA bundle:
oc label configmap keycloak-certs \
  app.kubernetes.io/part-of=che.eclipse.org \
  app.kubernetes.io/component=ca-bundle \
  -n eclipse-che
6. Prepare the CheCluster Configuration
Create a patch file that configures Che to use Keycloak
for authentication. Replace
<KEYCLOAK_URL> with the actual Keycloak
URL, <OPENSHIFT_REALM> with the
Keycloak realm configured for OpenShift authentication,
and the claim and prefix values with those configured in
the authentication.config/cluster resource:
cat > che-patch.yaml << EOF
kind: CheCluster
apiVersion: org.eclipse.che/v2
spec:
  networking:
    auth:
      oAuthClientName: eclipse-che
      oAuthSecret: oauth-secret
      identityProviderURL: "<KEYCLOAK_URL>/realms/<OPENSHIFT_REALM>"
      gateway:
        oAuthProxy:
          cookieExpireSeconds: 300
        deployment:
          containers:
            - name: oauth-proxy
              env:
                - name: OAUTH2_PROXY_CODE_CHALLENGE_METHOD
                  value: S256
                - name: OAUTH2_PROXY_BACKEND_LOGOUT_URL
                  value: "<KEYCLOAK_URL>/realms/<OPENSHIFT_REALM>/protocol/openid-connect/logout?id_token_hint={id_token}"
  components:
    cheServer:
      extraProperties:
        CHE_OIDC_GROUPS__CLAIM: '<GROUPS_CLAIM>'
        CHE_OIDC_GROUPS__PREFIX: '<GROUPS_PREFIX>'
        CHE_OIDC_USERNAME__CLAIM: '<USERNAME_CLAIM>'
        CHE_OIDC_USERNAME__PREFIX: '<USERNAME_PREFIX>'
EOF
7. Deploy Eclipse Che
chectl server:deploy --platform openshift --che-operator-cr-patch-yaml che-patch.yaml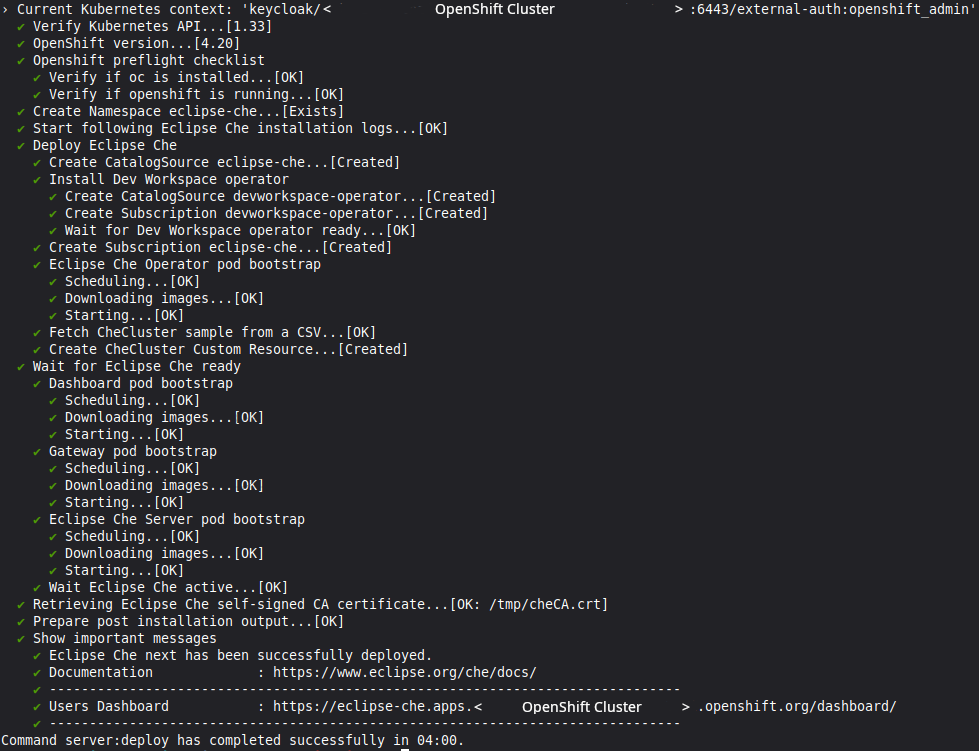
8. Configure the Callback URL in Keycloak
After deployment, update the
eclipse-che client in Keycloak with the
redirect URI and web origin:
-
Get the Eclipse Che URL:
oc get checluster eclipse-che -n eclipse-che \ -o jsonpath='{.status.cheURL}' -
In the Keycloak Admin Console, open the
eclipse-checlient. -
Paste the URL with
/oauth/callbackappended into Valid redirect URIs. -
Paste the URL into Web origins.
-
Save.
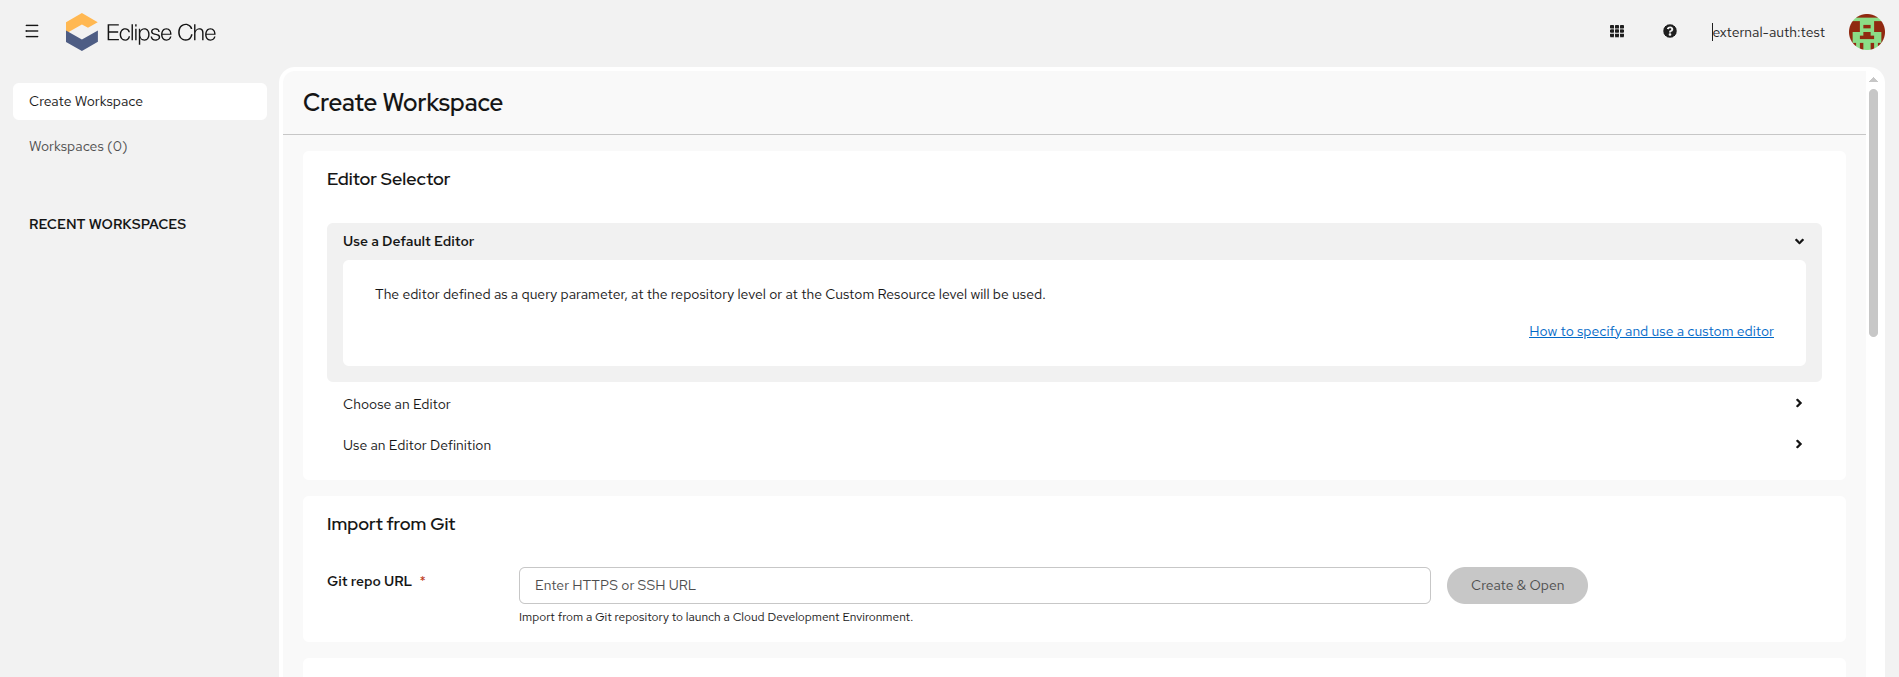
9. Start a Workspace
Once everything is configured, open the dashboard and start a workspace:
chectl dashboard:openYou should be redirected to the Keycloak login page. After authenticating, the Eclipse Che dashboard opens.
For the full reference documentation, see Installing Che on OpenShift with Keycloak as external identity provider.