Reviewing pull requests
Reviewing pull requests for a GitHub project integrated with Eclipse Che.
Demo Video
Using Eclipse Che to review pull requests
With Google Chrome, Eclipse Che makes it possible to review a pull request (PR) without setting up runtimes, build tools, or any extra software on the local machine.
This blog post will showcase the typical workflow of reviewing PRs of a GitHub project that is well-integrated with Eclipse Che. Here is the GitHub project used in this blog post: www.github.com/che-incubator/quarkus-api-example.
You can refer to these articles on how to set up your project with Eclipse Che:
|
Note
|
Your project must contain a well-defined
devfile.yaml file to make the most out of
your development experience with Eclipse Che. Use
the devfile to define your project’s development
environment such as development commands, containers,
endpoints, and so on.
|
|
Warning
|
The following scenario uses devfile v2, and Eclipse Che is deployed alongside the DevWorkspace engine which is currently not used on Eclipse Che Hosted by Red Hat. To open the test GitHub project on Eclipse Che Hosted by Red Hat, please use the devfilev1 branch which supports the deprecated devfile v1. |
The scenario
Imagine that you’re developing a REST API with Quarkus
that interacts with Food resources from a
PostgreSQL database.
/* Food.java */

@Entity
public class Food extends PanacheEntity {

    @Column(length = 40)
    public String name;

    @Column(length = 40)
    public String restaurantName;

    public double price;

}
In the current state of the project, there are four endpoints:
| Method | Endpoint | Description |
|---|---|---|
|
|
|
Lists all Food resources |
|
|
|
Retrieves the Food resource with the specified ID |
|
|
|
Retrieves a Food resource with the specified name |
|
|
|
Creates a Food resource |
It looks like your colleague has opened a new PR that adds a
new GET endpoint,
/food/restaurant/{restaurantName}. The endpoint
retrieves a list of all Food resources served
from a specified restaurant:
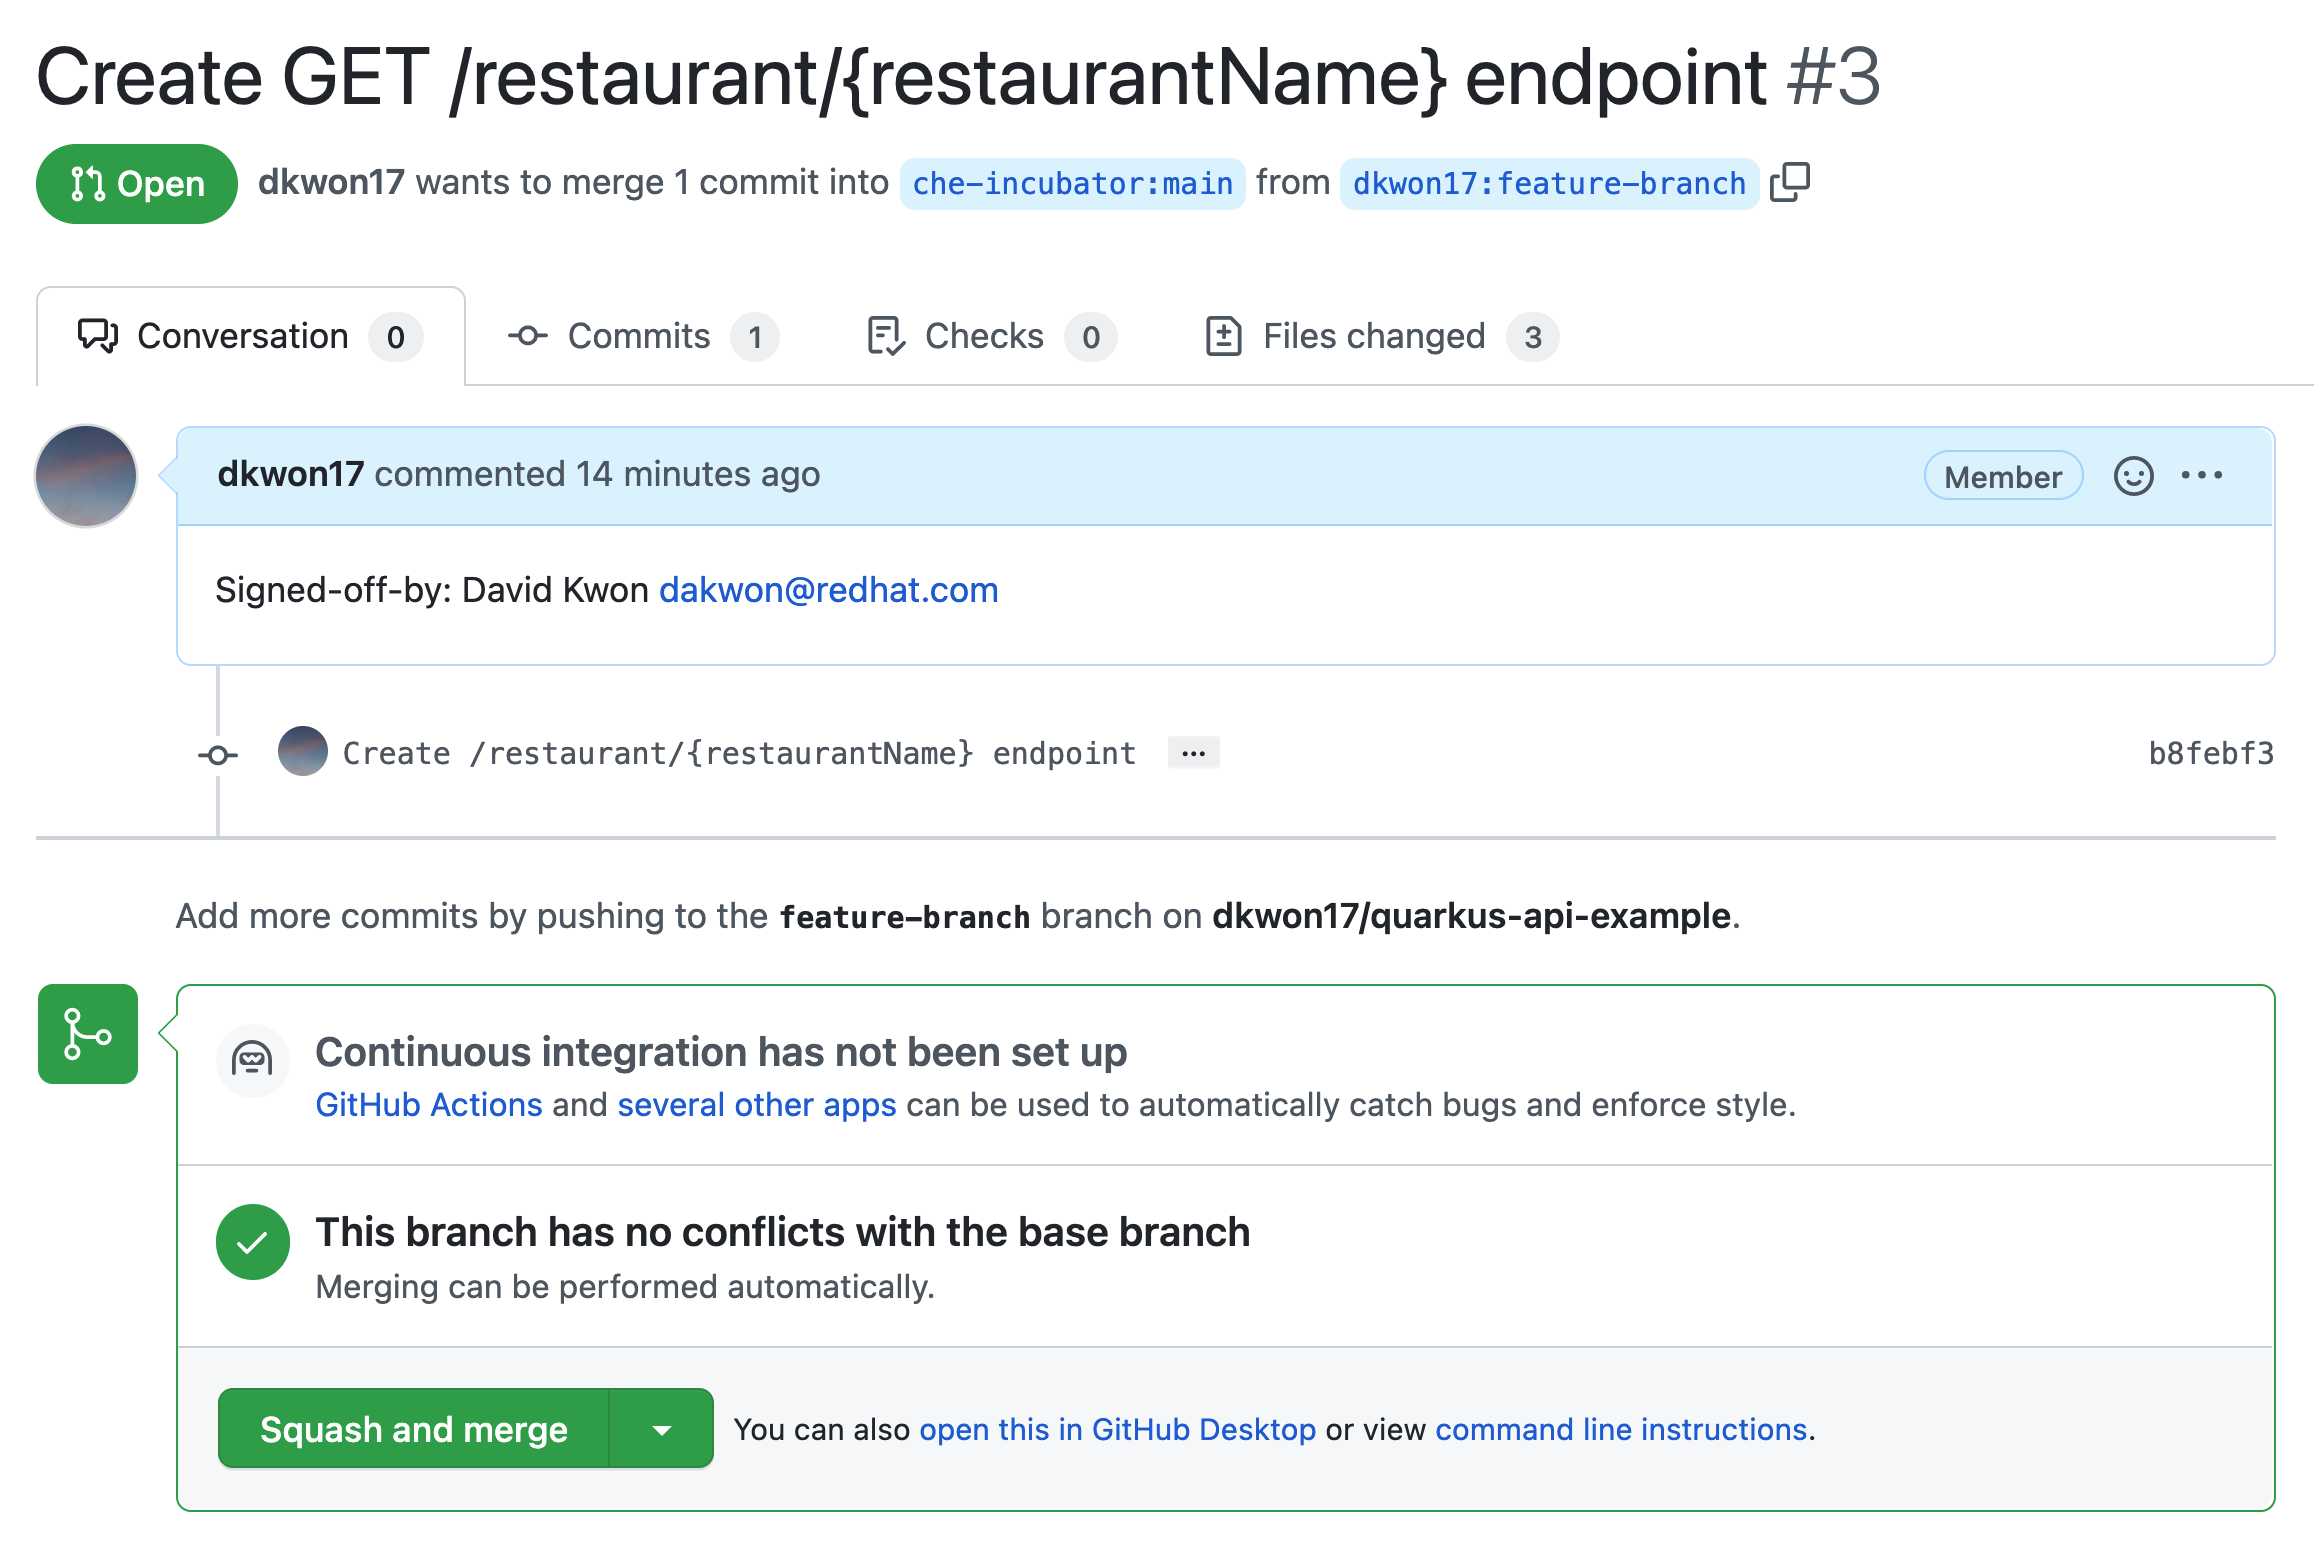
Figure 1: The GitHub PR you need to review.
Review this PR by launching a new Eclipse Che workspace. Here you can verify the PR by running unit tests, running the application, accessing the endpoint, and building the application, all within your web browser.
Start the workspace and Web IDE editor on
Eclipse Che Hosted by Red Hat
by clicking the Eclipse Che badge from the base GitHub
repository’s README:
Figure 2: Clicking on a badge from the base
repository’s README.md launches a
developer workspace.
Launching a workspace and reviewing the PR
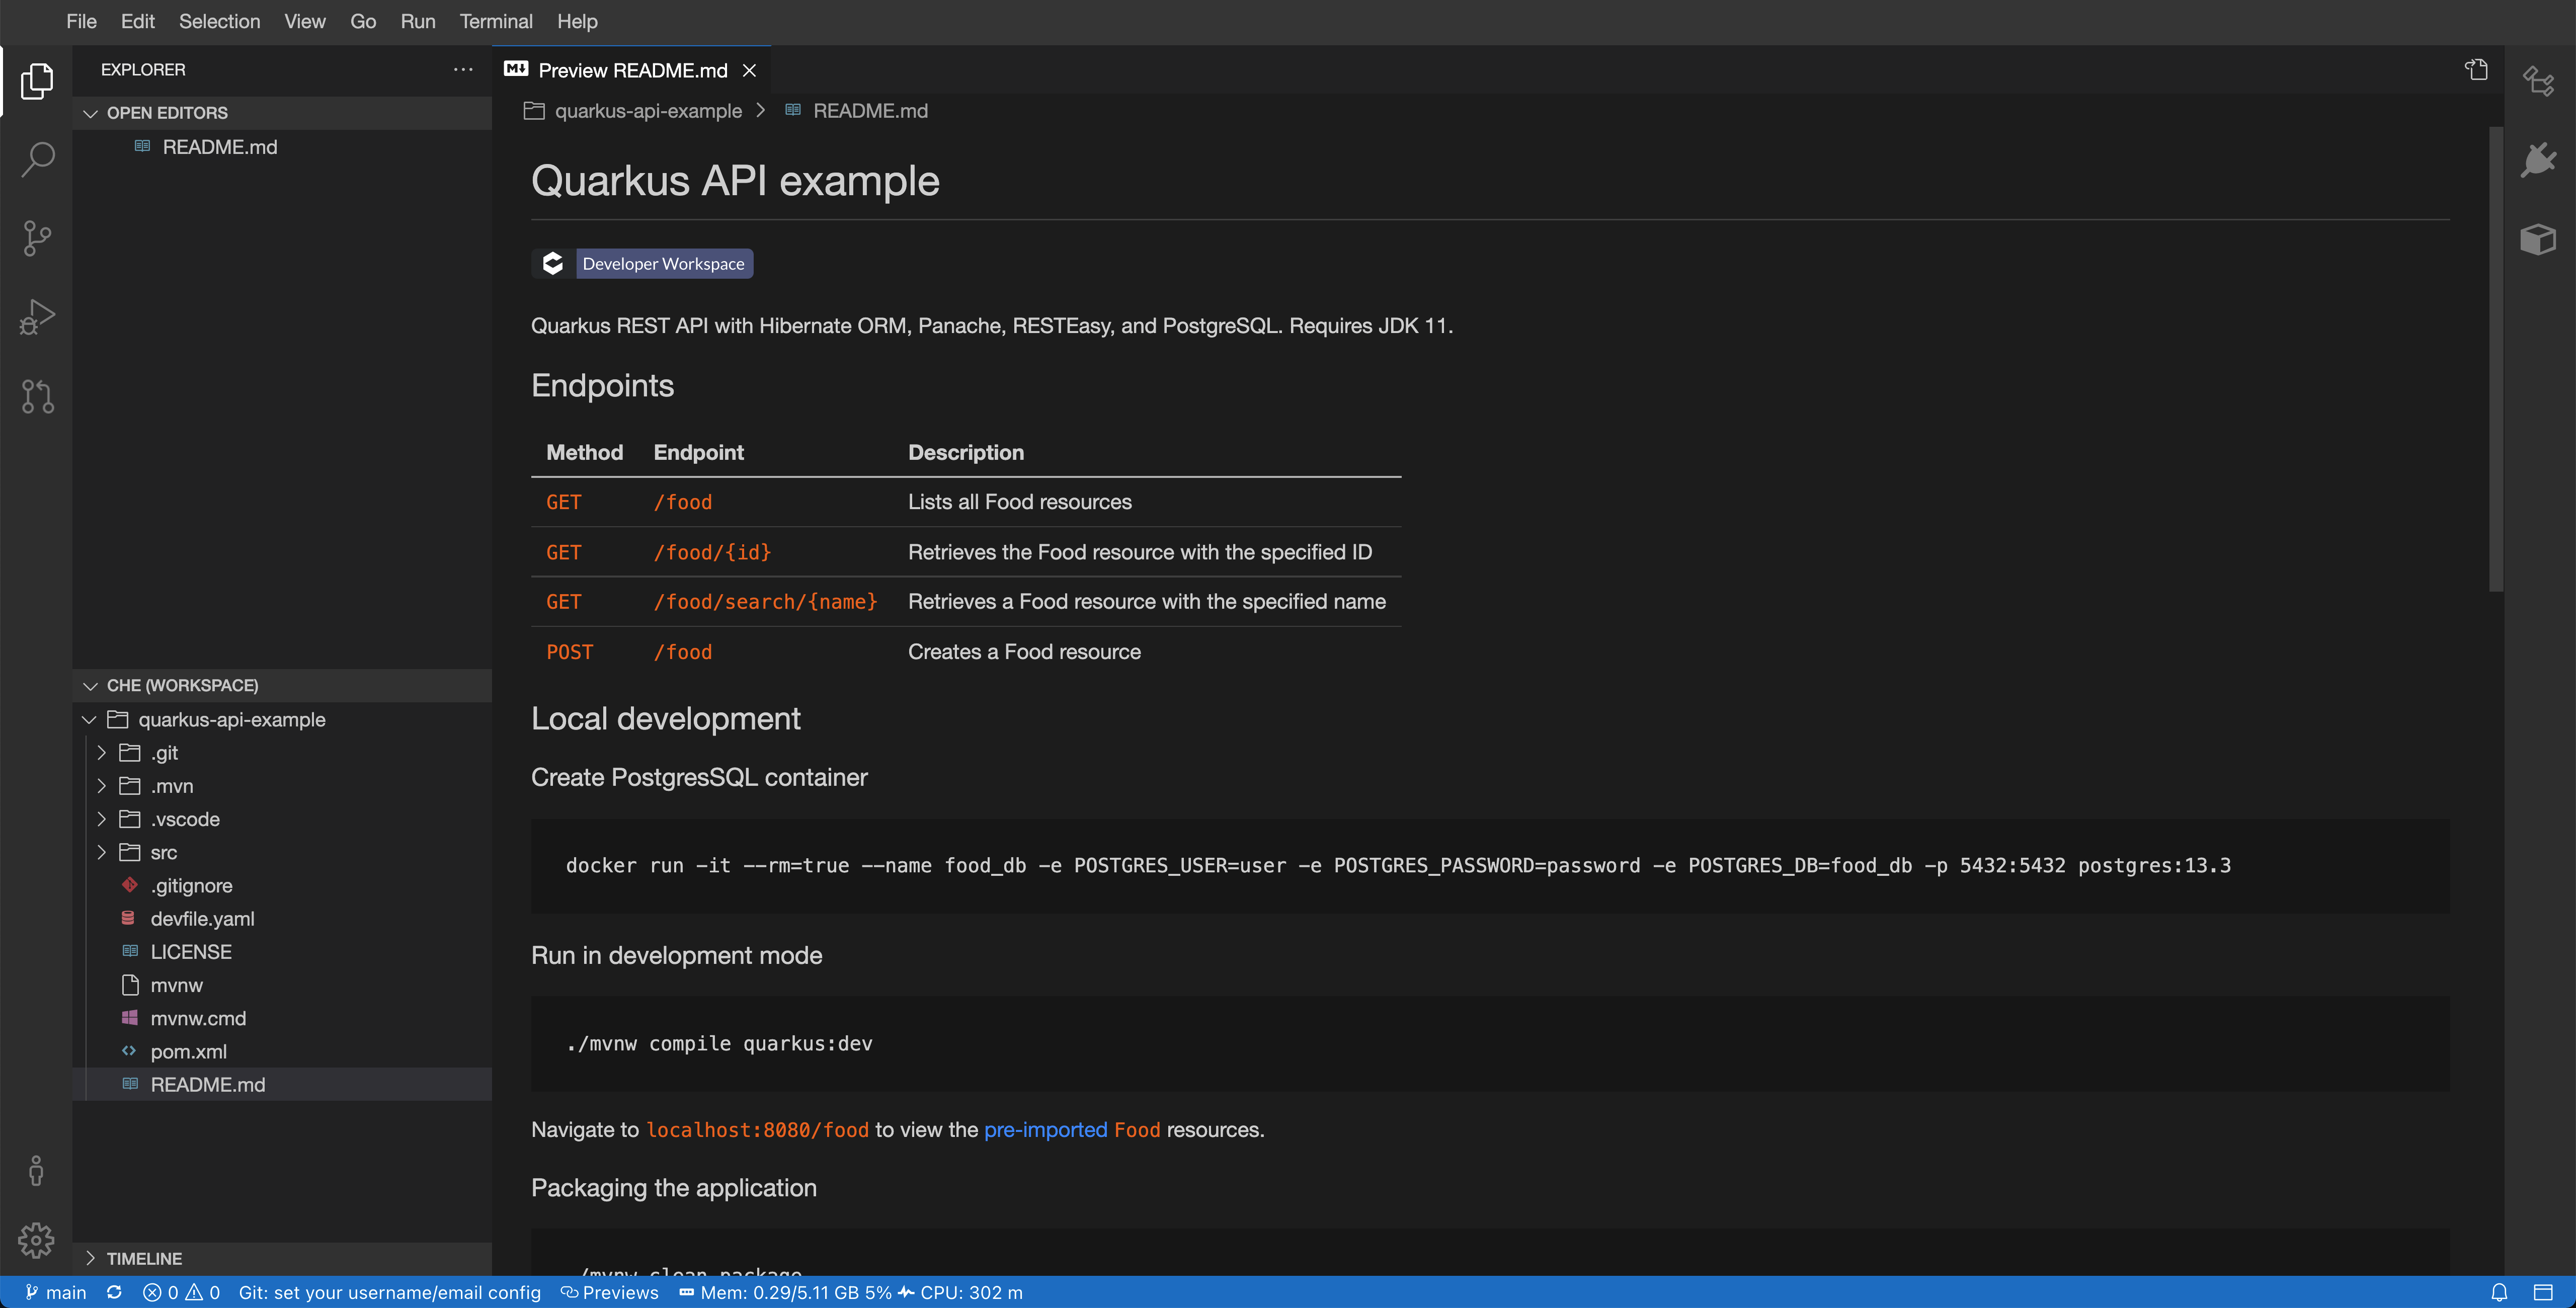
Figure 3: The Che-Theia editor.
After you start the workspace, the web IDE will open automatically and you’ll see that the project has been cloned already (see the Explorer view on the left-hand side).
To use the GitHub Pull Requests and Issues extension, you must first authenticate with GitHub by clicking on the Accounts icon on the bottom left of the editor. The extension adds the GitHub view to the sidebar and provides integration with GitHub. As a result, you can make PR comments, in-editor comments, approve PRs, and much more, all from the web IDE.
Click on "Sign in to user GitHub Pull Requests and Issues (1)". You will be prompted to enter your GitHub credentials to sign in.
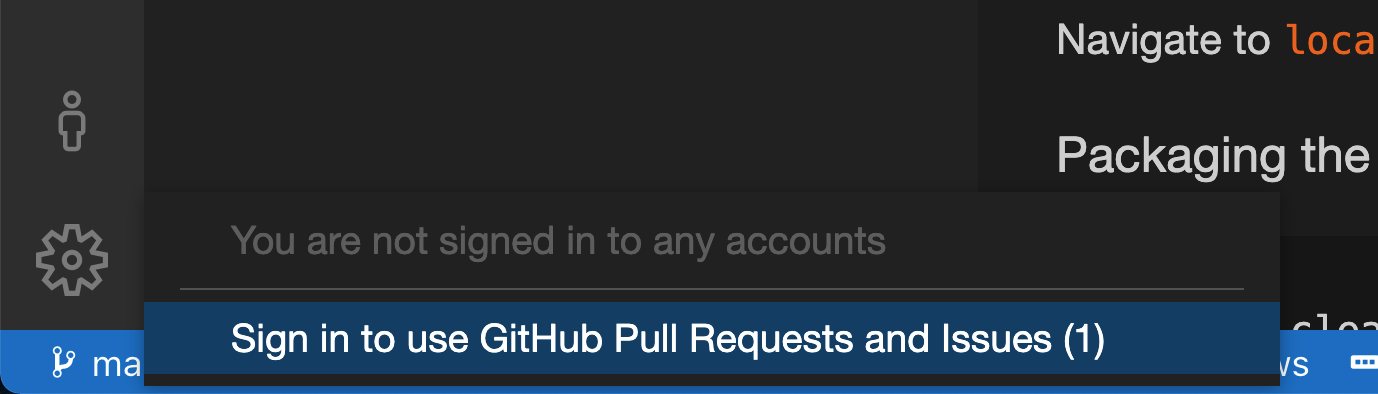
Figure 4: The menu appears after clicking the Accounts icon.
After signing in, navigate to the GitHub view from the sidebar to see an overview of PRs against the base repository. Under the "Assigned To Me" drop-down, you can see the PR that you’ll review.
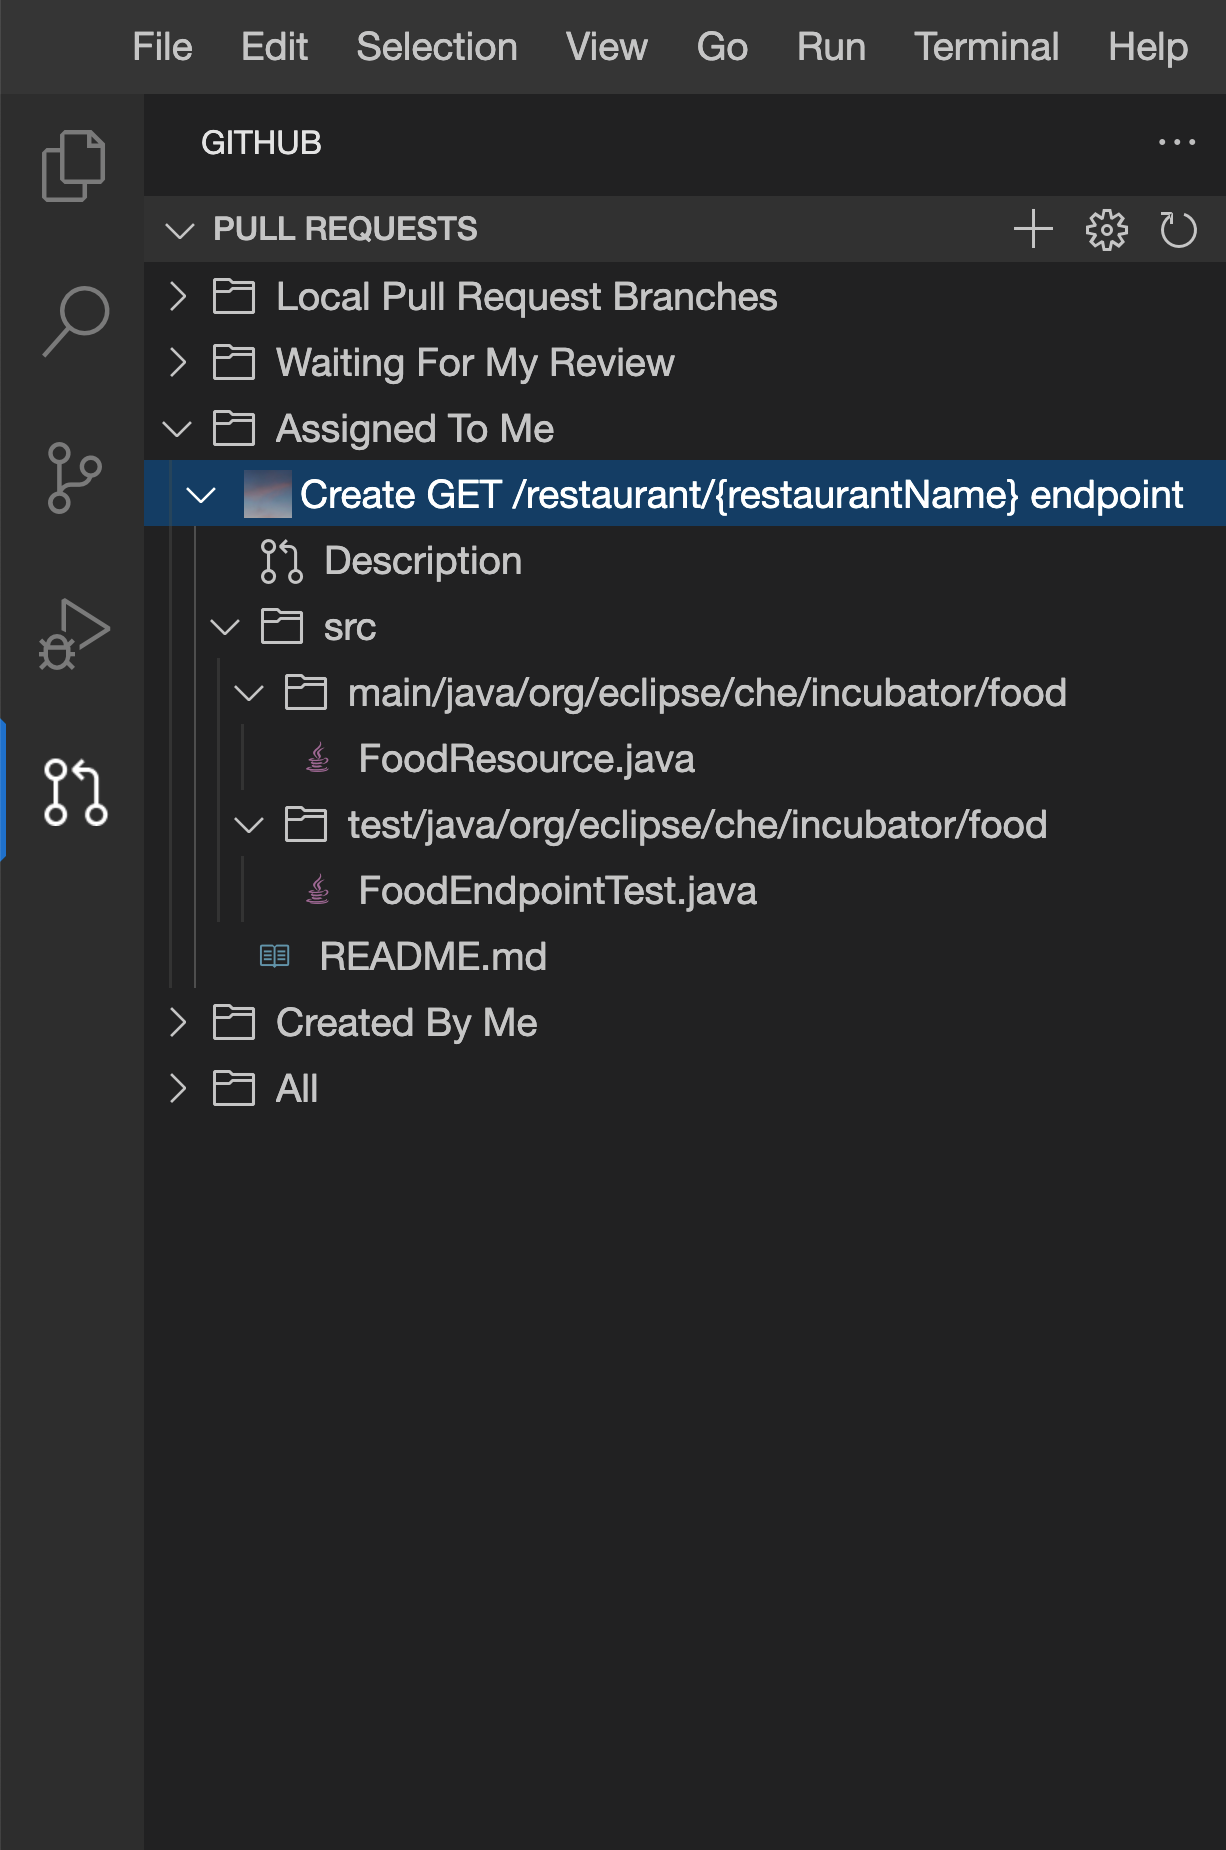
Figure 5: The GitHub view, opened by clicking on the fifth icon from the top.
|
Warning
|
If you start a workspace with a badge generated using the Try in Web IDE GitHub action on a PR from a forked repository, you must manually set up Git remotes to use the GitHub Pull Requests and Issues extension. Please see redhat-actions/try-in-web-ide#14. |
The "Description" menu item, as well as a file hierarchy
with all changed files, are in the drop-down menu below the
PR. In this case, the changed files are
FoodResource.java,
FoodEndpointTest.java, and
README.md. Click on the files to open a diff
view within the web IDE. Examine these files and verify that
the PR adds a new endpoint, as well as a unit test.
Click on the "Description" menu item to open a new web view displaying the PR in a UI similar to GitHub. Check out the branch by clicking "Checkout" at the top right of Figure 6.
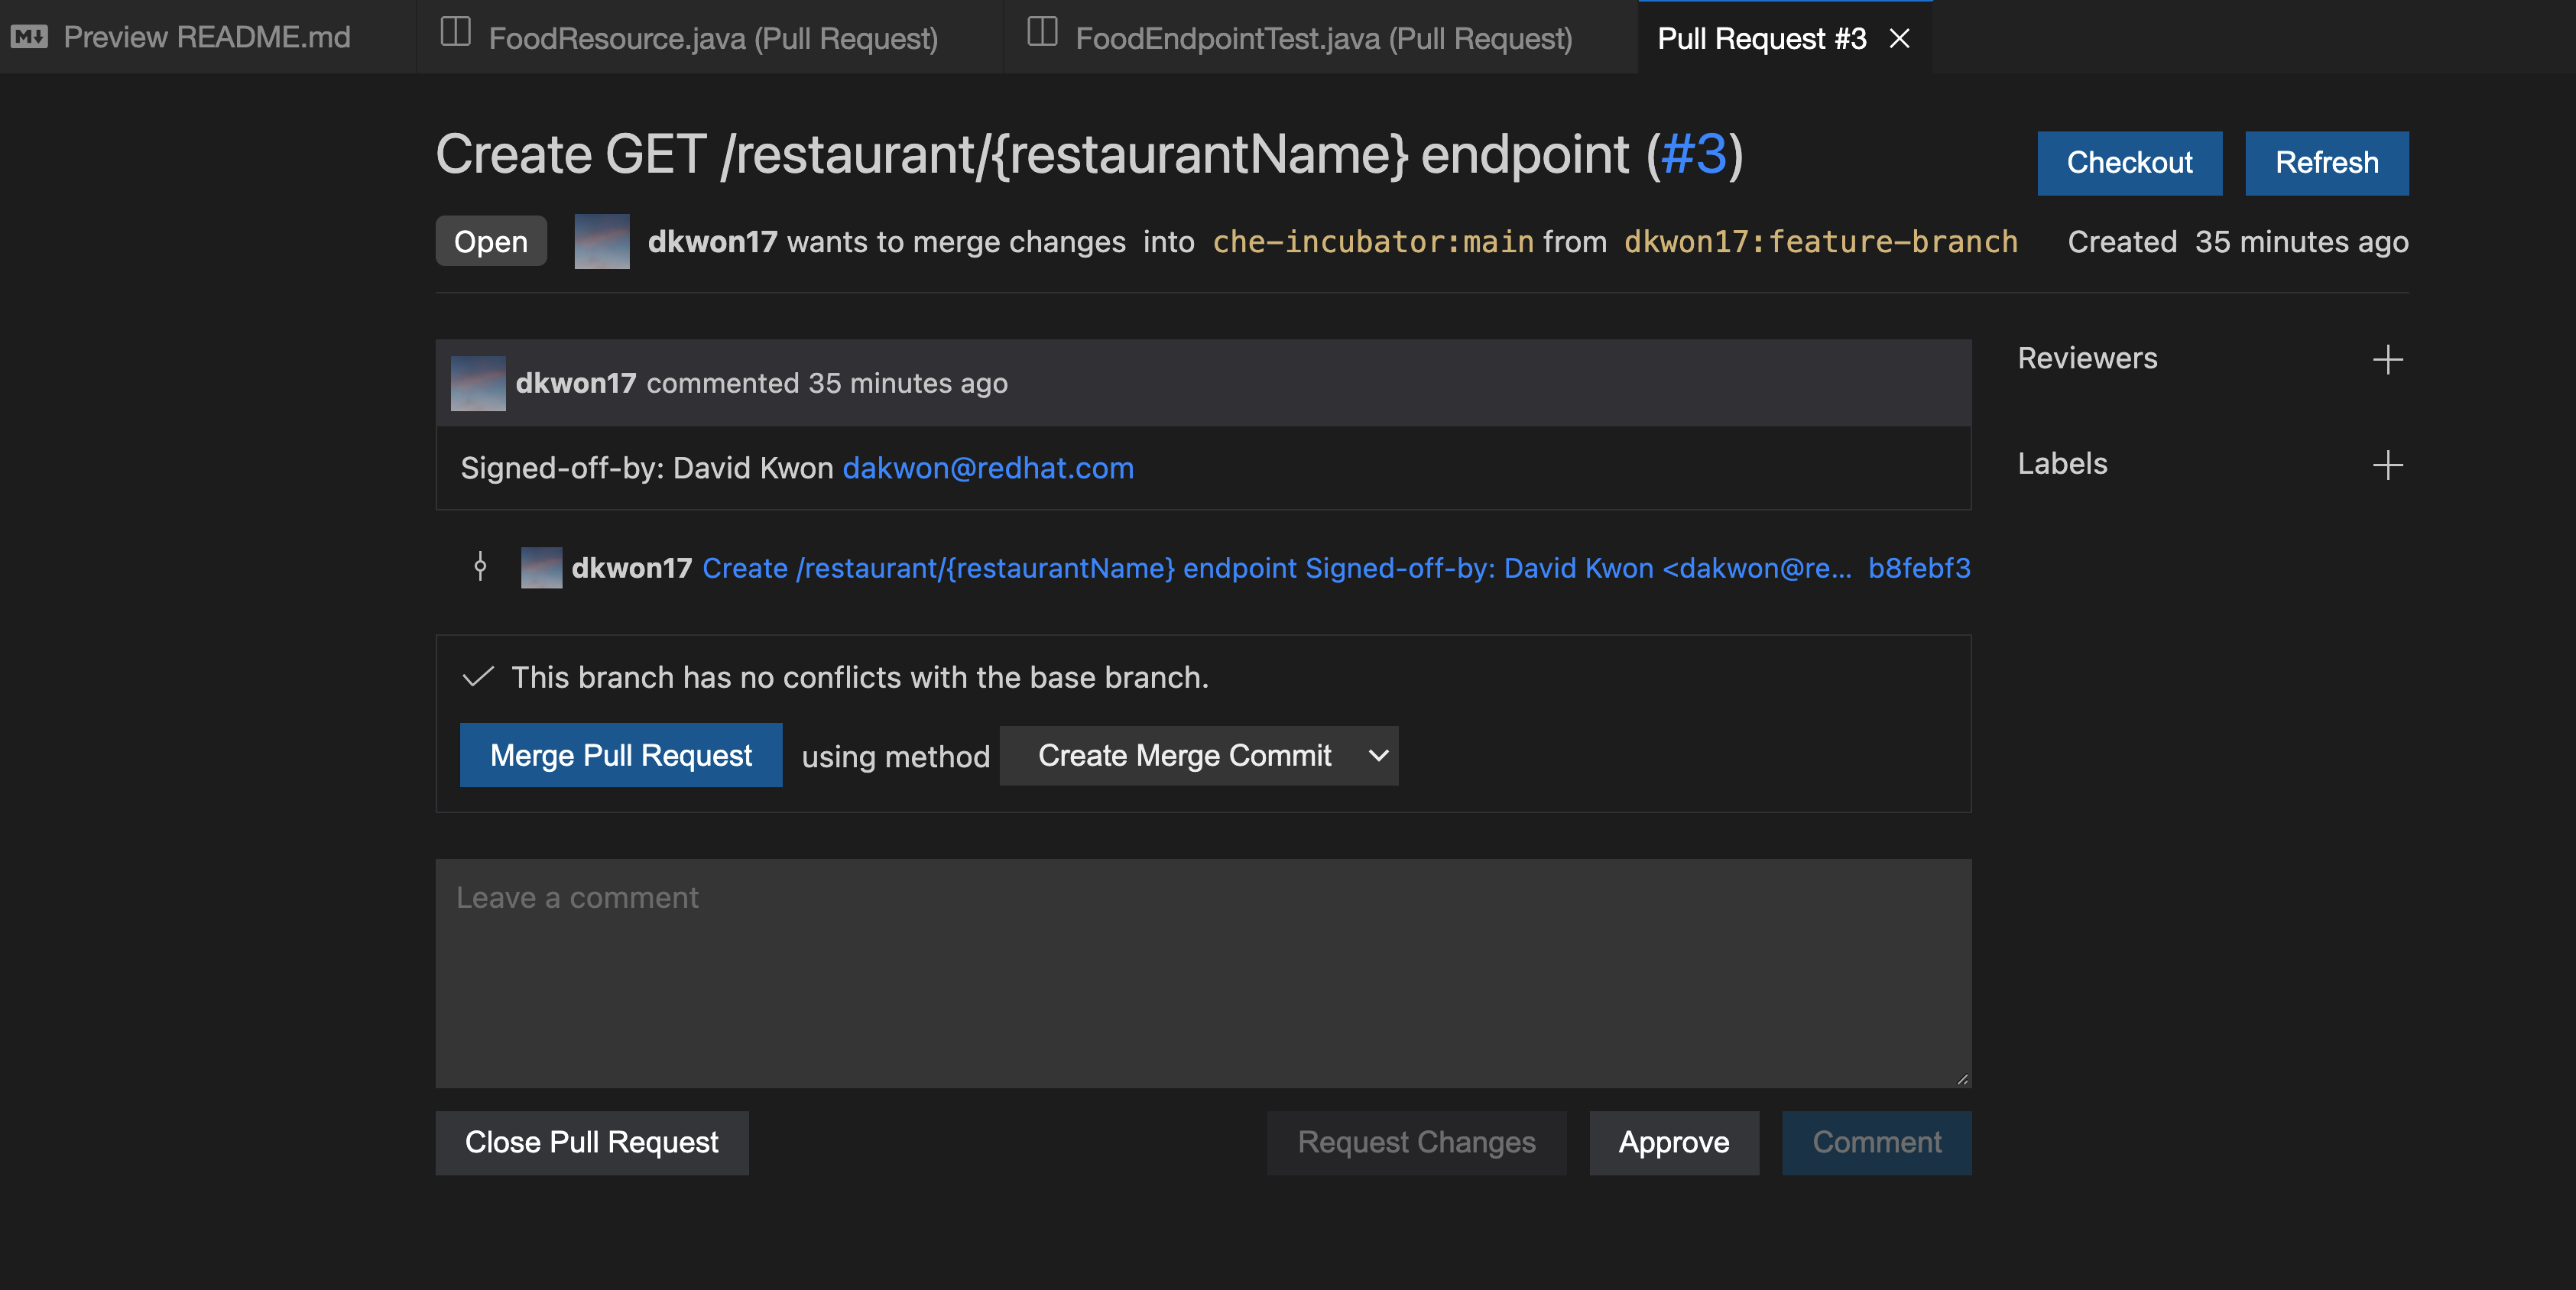
Figure 6: A webview displaying details about the PR. This web view appears after clicking the "Description" menu item from Figure 5.
The test project includes a preinstalled Language support for Java ™ extension in the web IDE. With this extension, you can check the Problem view to verify that there are no compilation problems such as syntax errors.
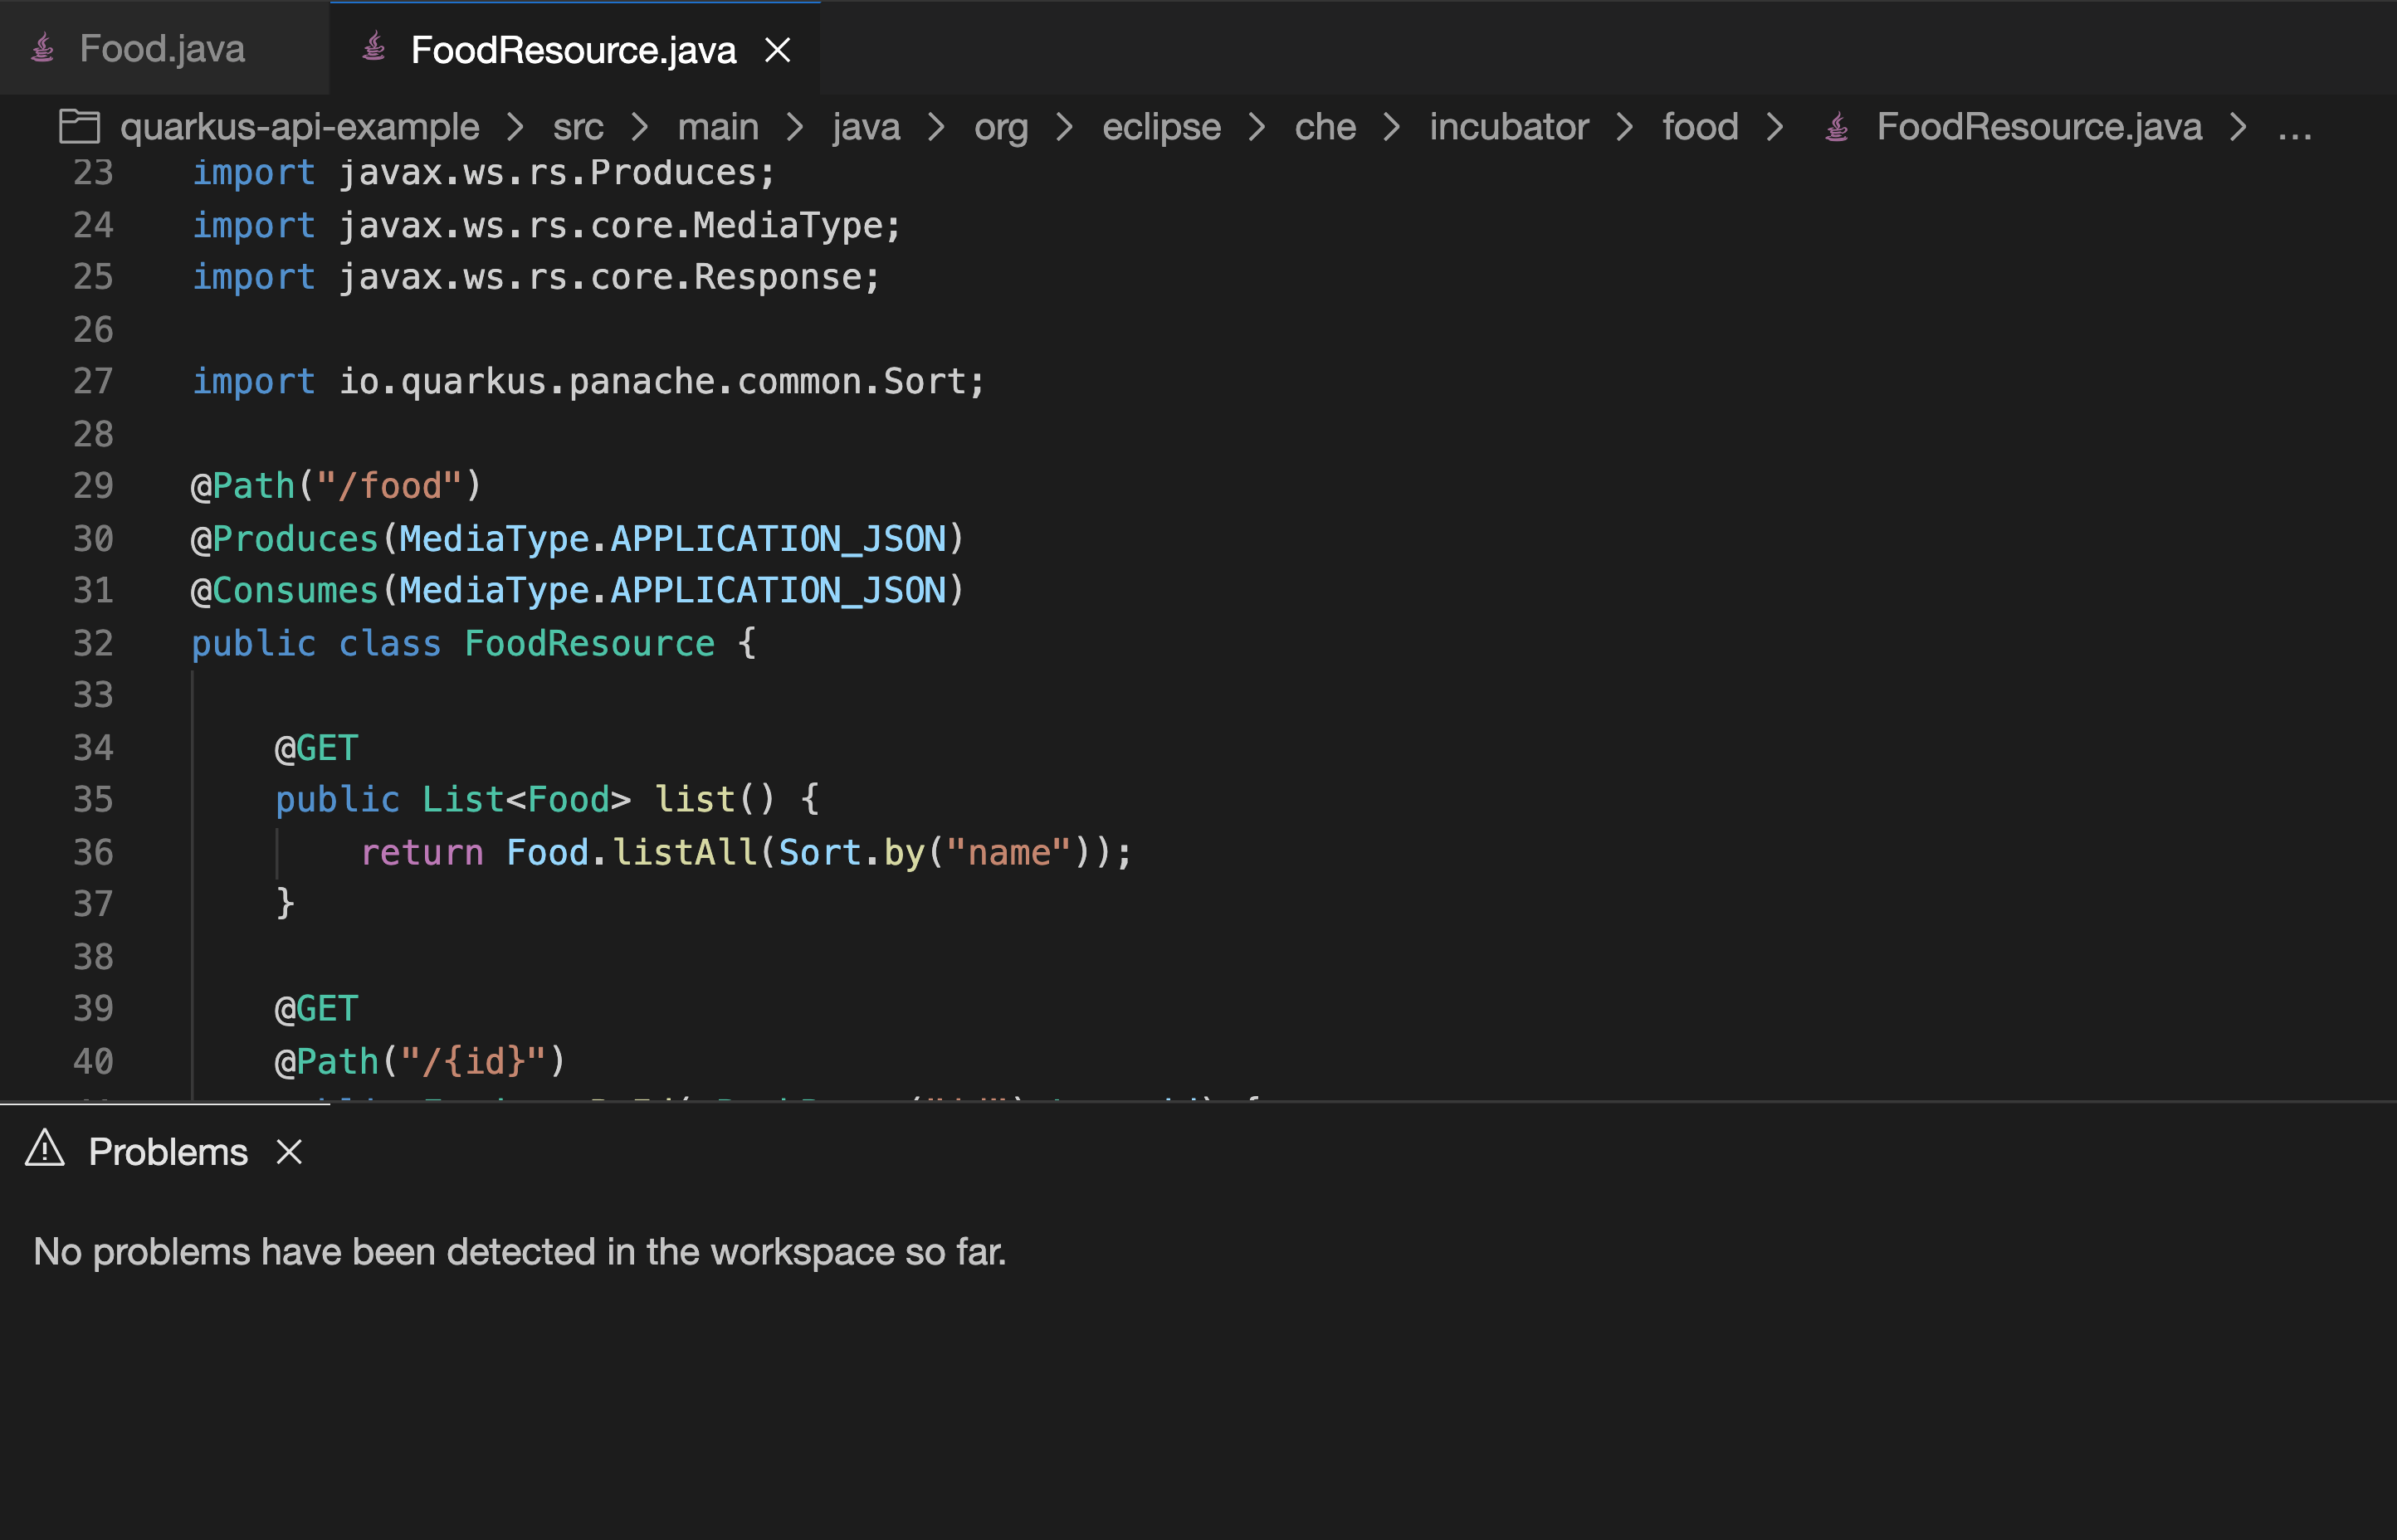
Figure 7: No problems reported by the Java extension in the Problems view.
Running unit tests and building
The devfile also defines commands for testing, building, and
launching the application. Run the unit tests by opening the
Workspace view from the right side and clicking
(User Runtimes → tools → runtests).
This runs the test command (./mvnw test) within
the tools container as specified in the
devfile. You can view the test output in the output panel.
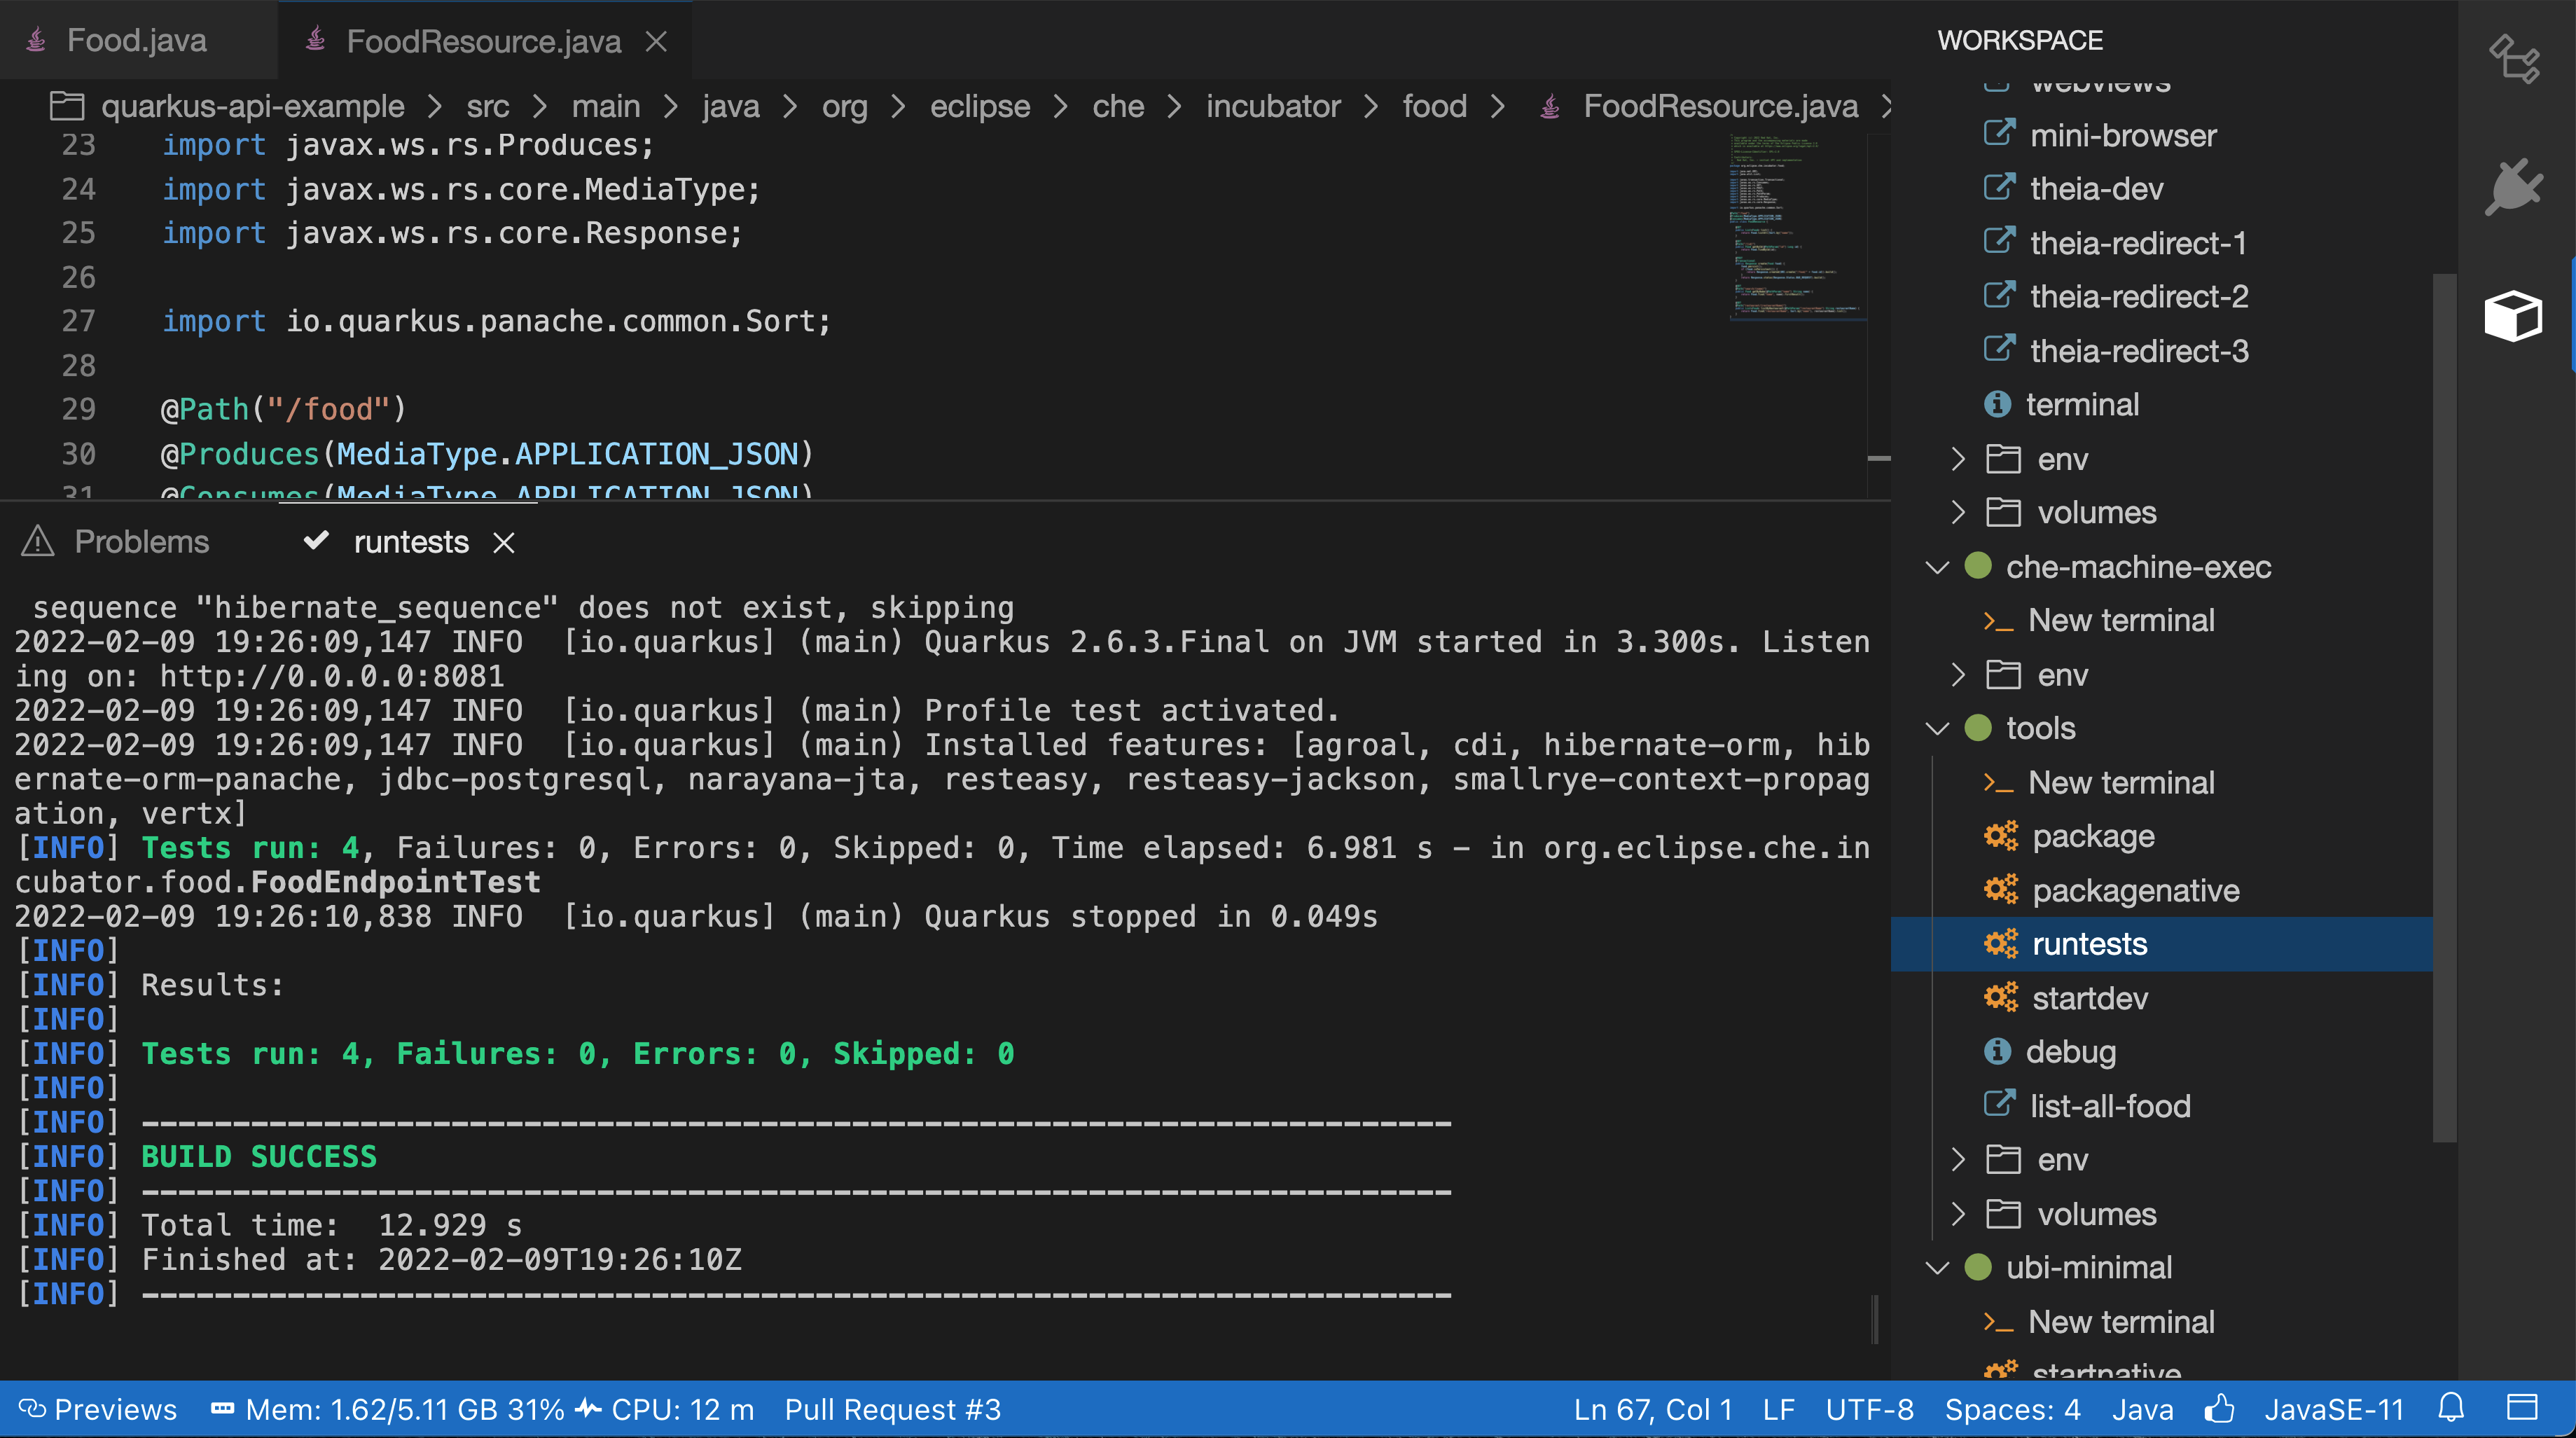
Figure 8: Unit testing by clicking
runtests from the Workspace view on the right.
As you can see in the output from Figure 8, you passed the tests successfully.
You can also run other commands such as
(User Runtimes → tools → package)
to build the application.
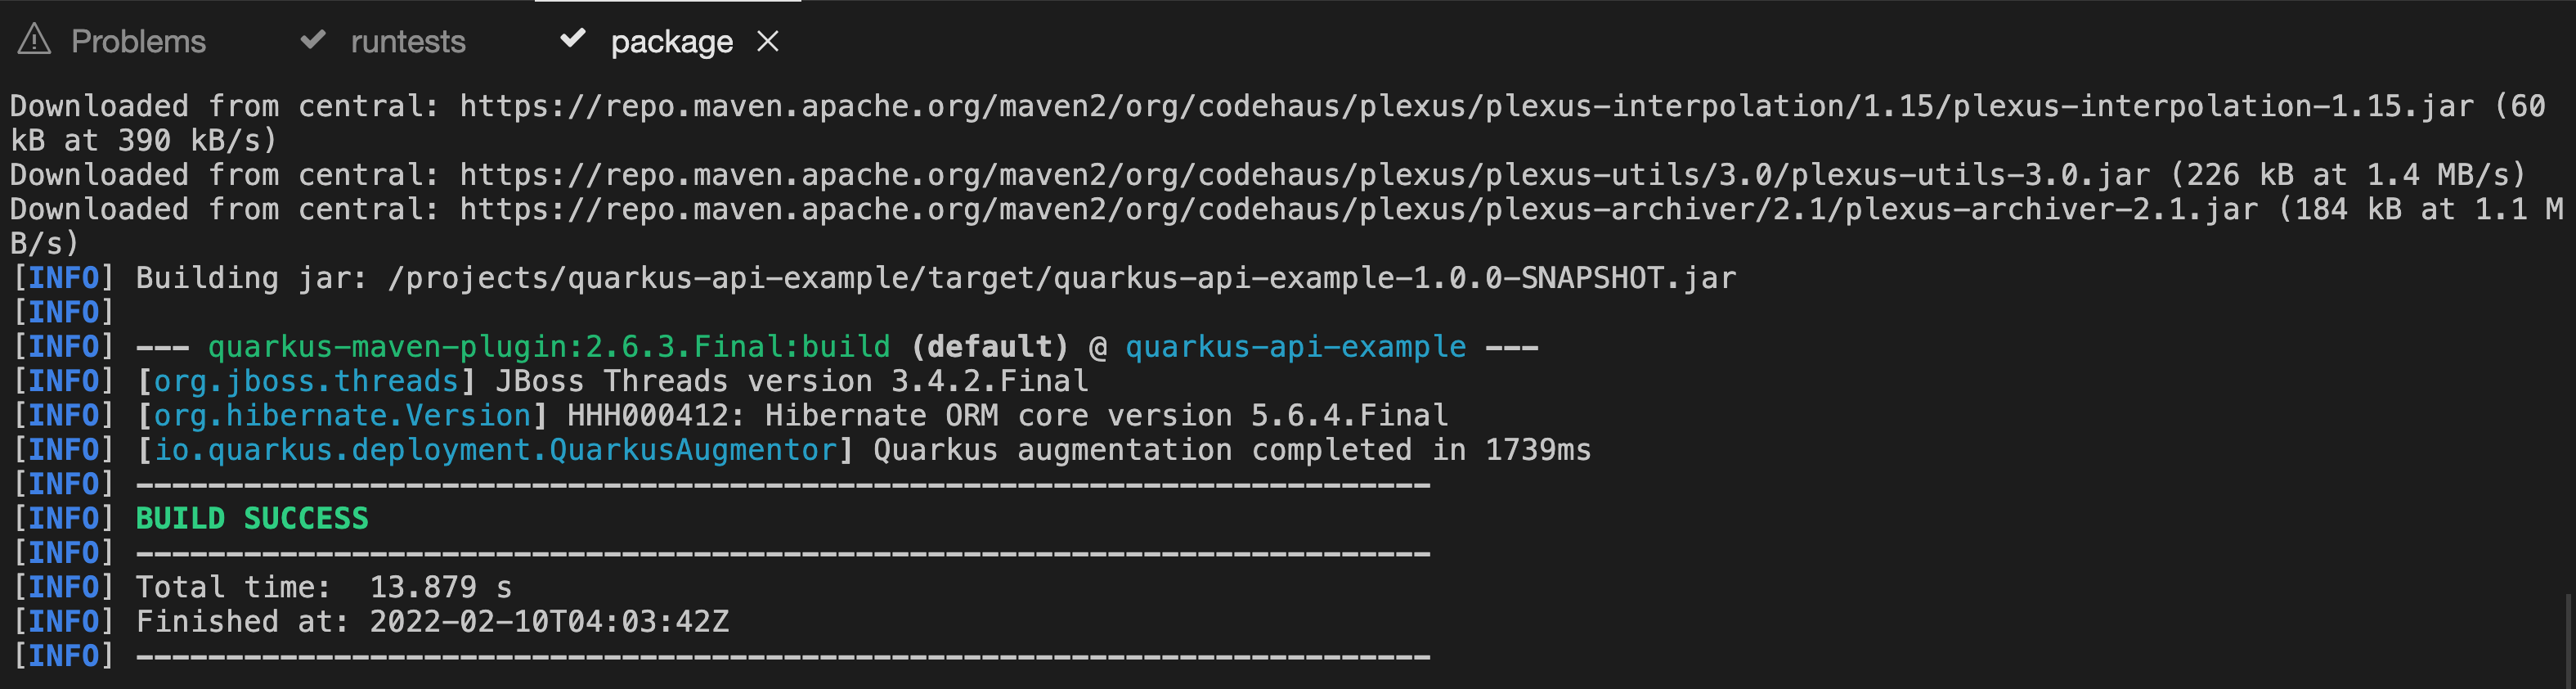
Figure 9: Successfully building the application.
|
Note
|
The packagenative command is used to build
a native image with GraalVM. The command would fail for
this test project on
Eclipse Che Hosted by Red Hat
due to the 7GB memory usage limit.
|
Running the application
Run the Quarkus application in
development mode
by running the
(User Runtimes → tools → startdev)
command to access the endpoint.
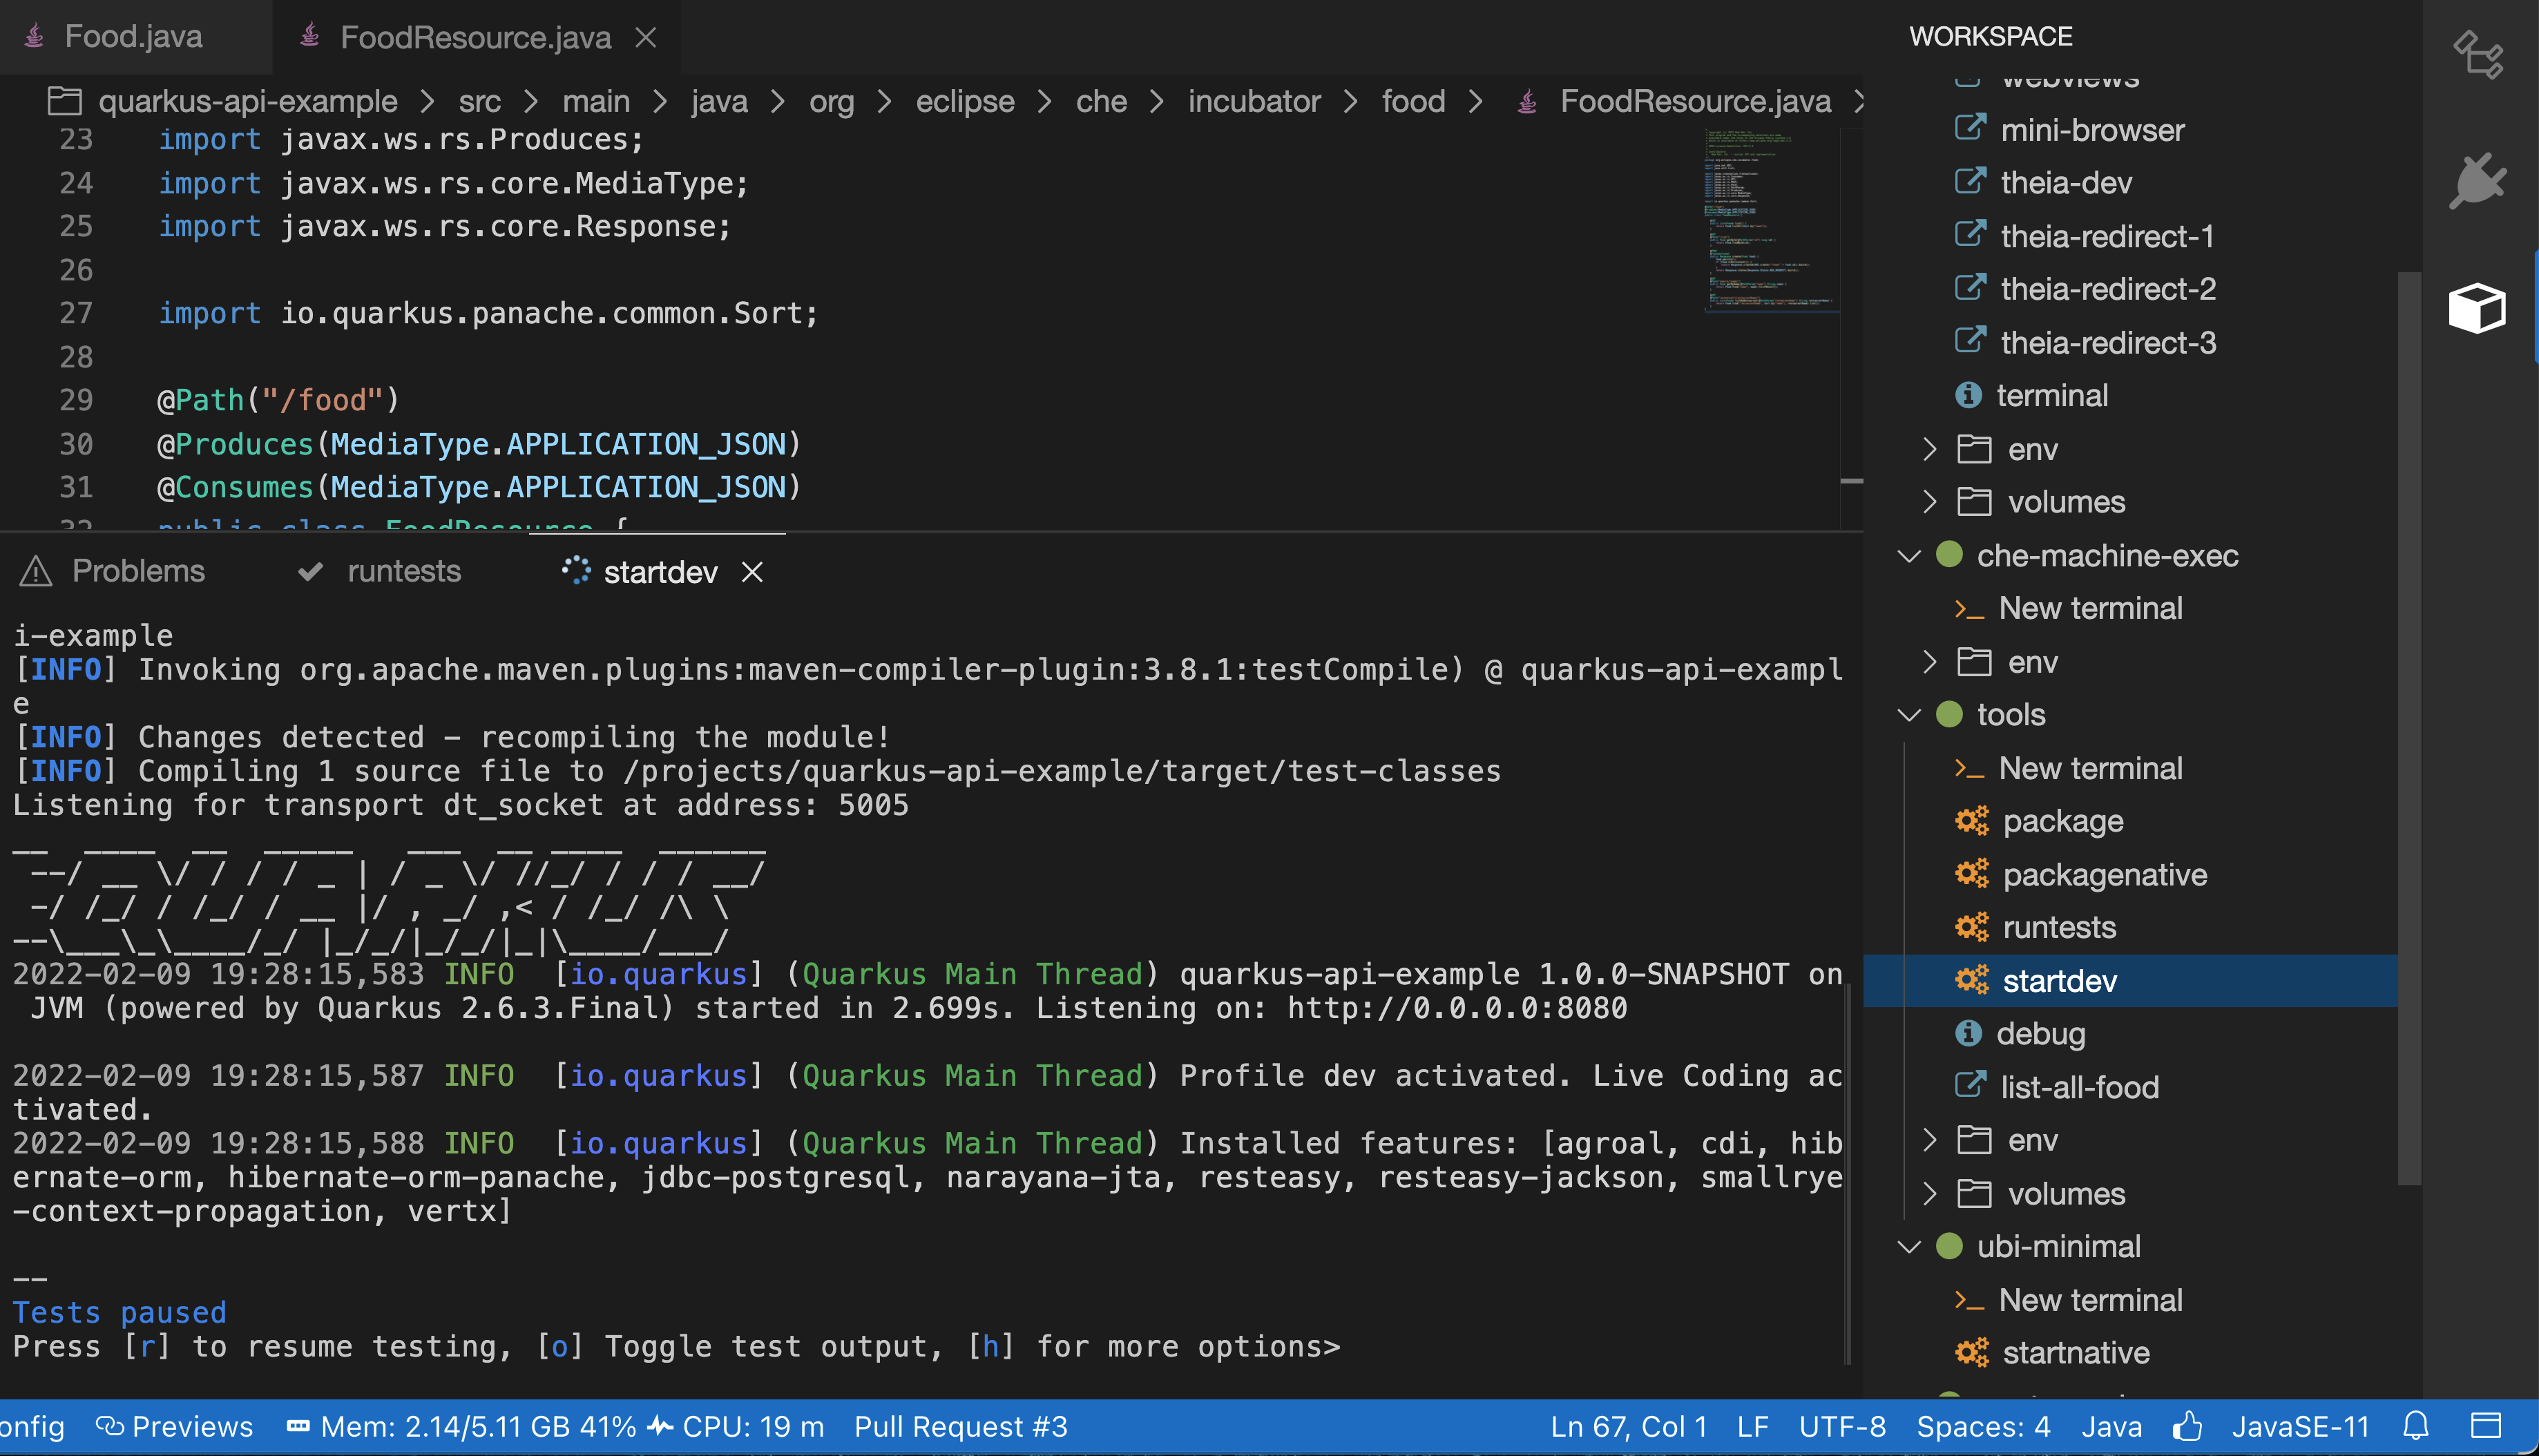
Figure 10: Starting the Quarkus project in development mode
by clicking startdev from the Workspace view on
the right.
Next, access the new
/food/restaurant/{restaurantName} endpoint.
Here, you access /food/restaurant/Local Deli to
get all Food resources from the restaurant
named Local Deli.
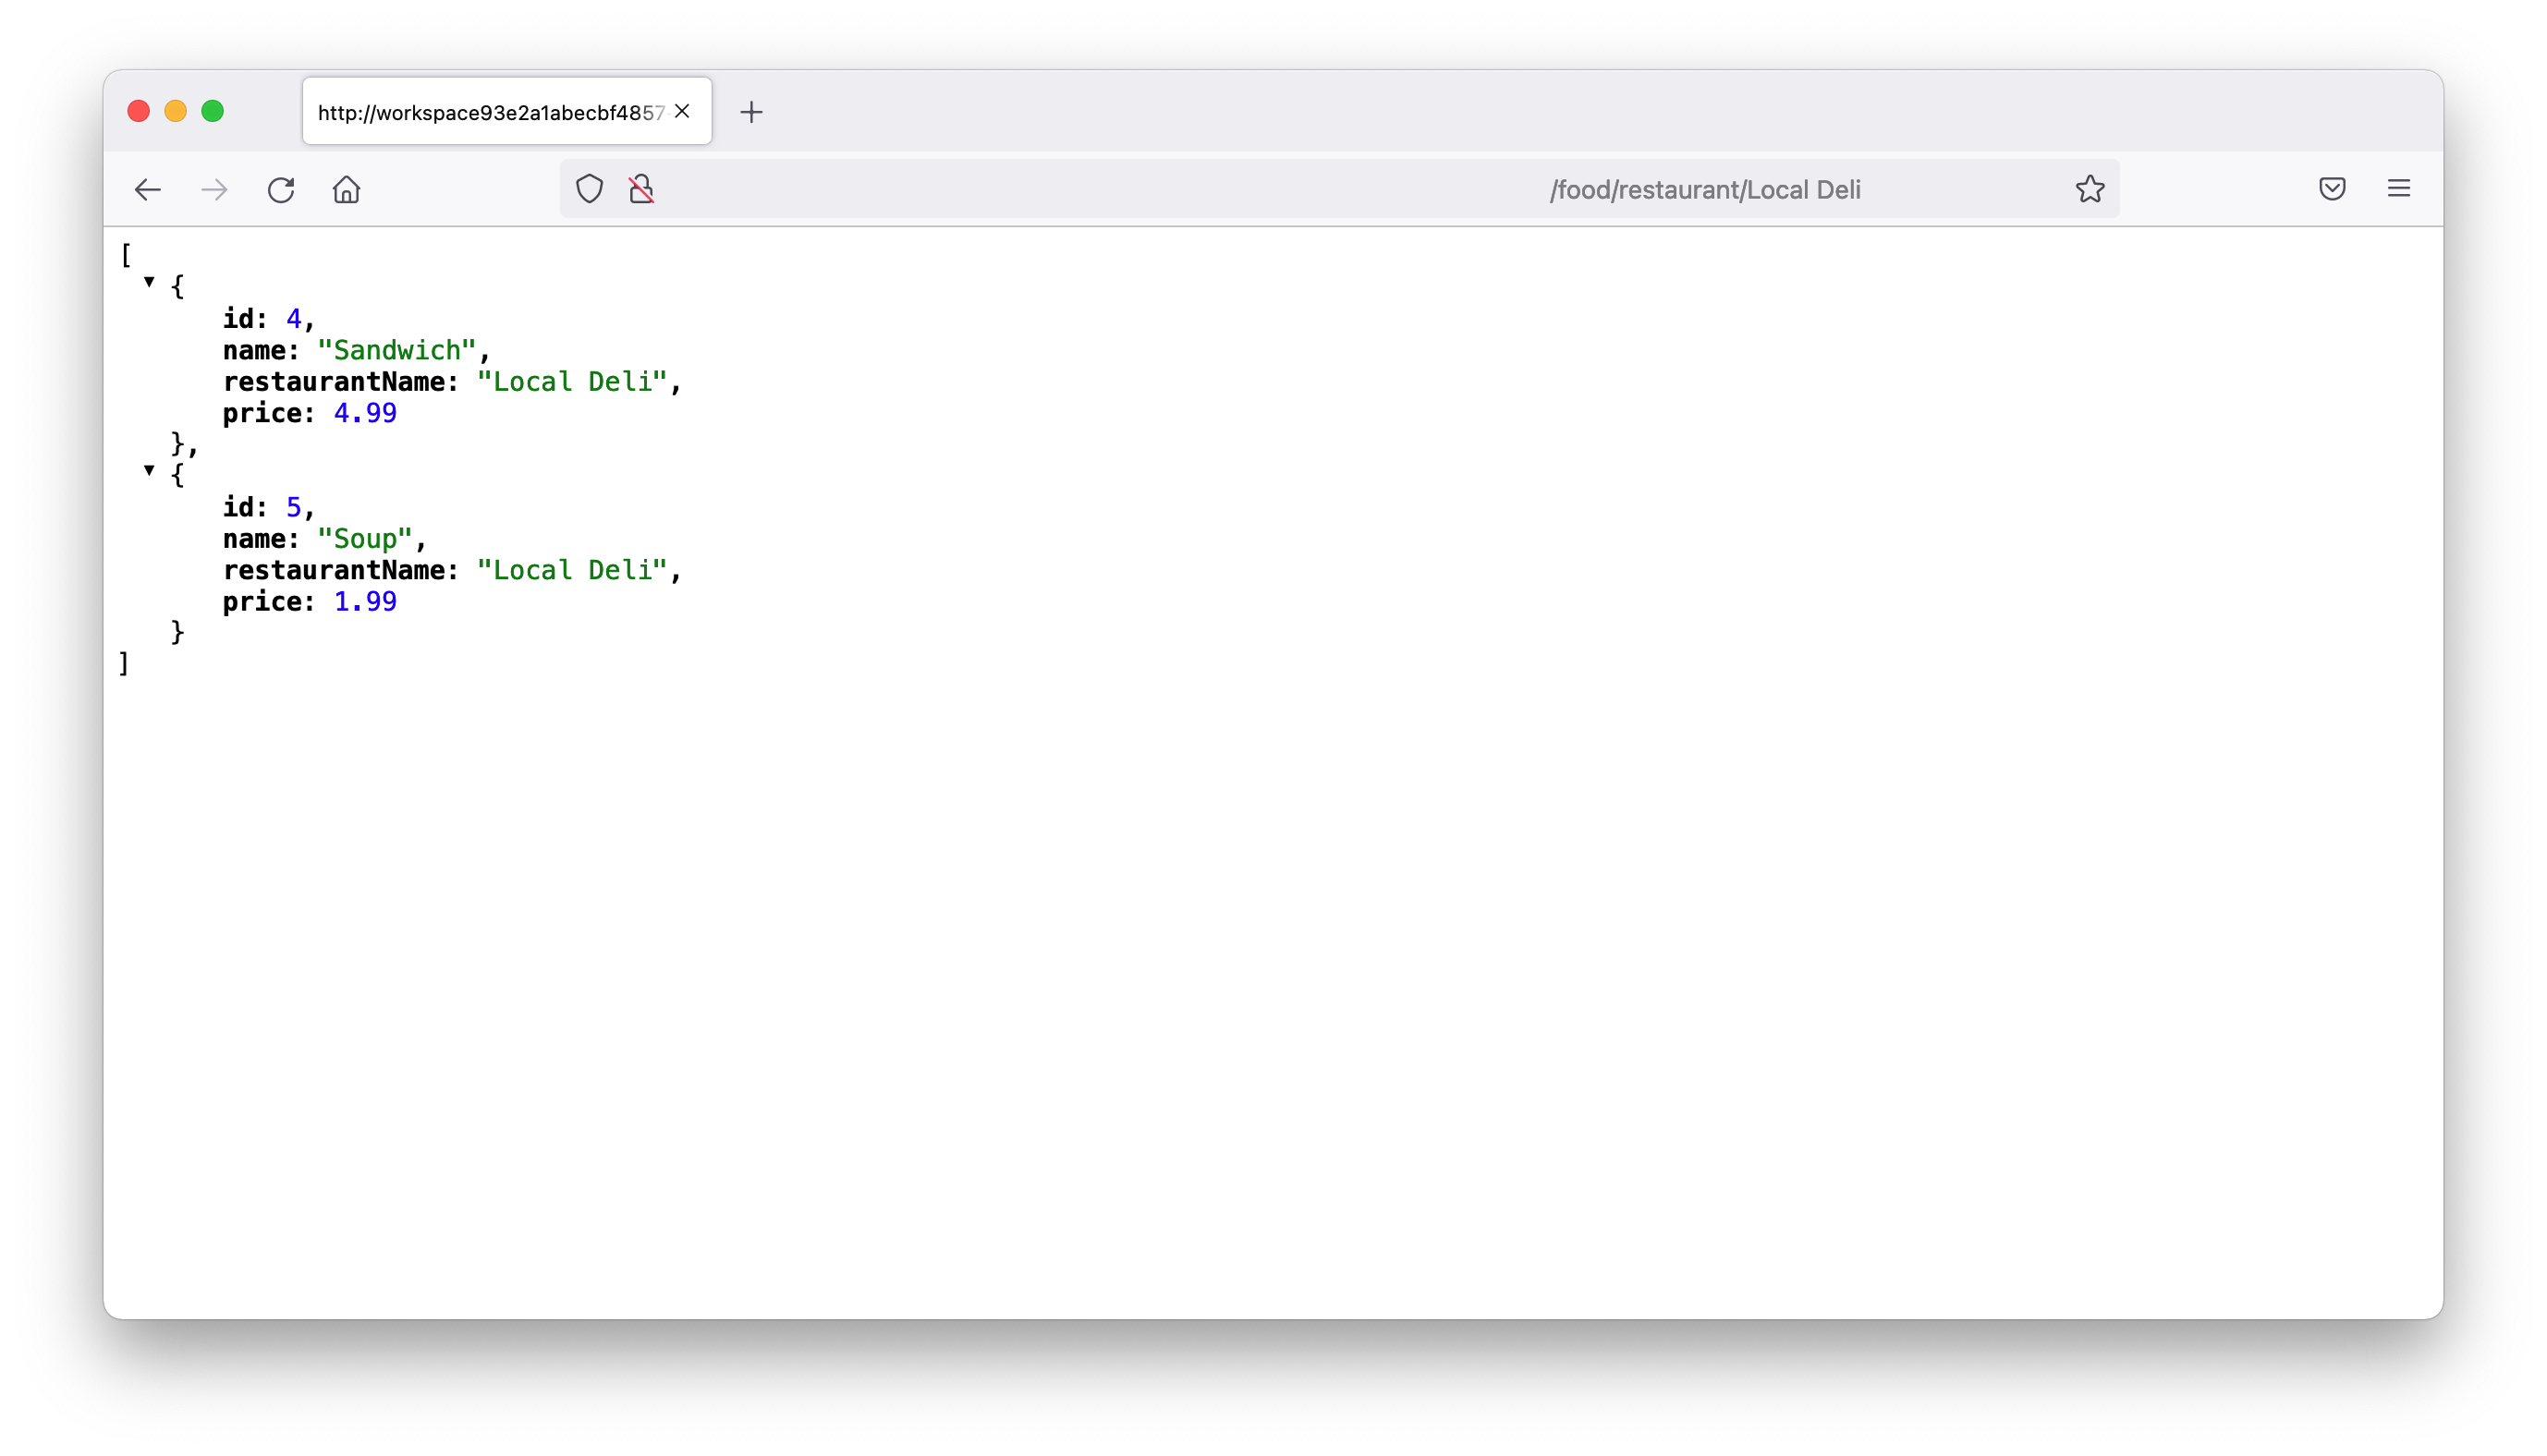
Figure 11: Response from
/food/restaurant/Local Deli.
The response contains two Food resources from
the Local Deli restaurant. This is a match with
the Food resources from this restaurant in the
import.sql
file.
Providing feedback and merging the PR
So far, you have successfully run tests, ran the build, as well as ran the application in development mode to verify that the PR is working correctly. Next, merge the PR from the web IDE.
Go back to the GitHub PR view (see Figure 5) to provide more
comments, and approve the PR. Merge the PR to
main.
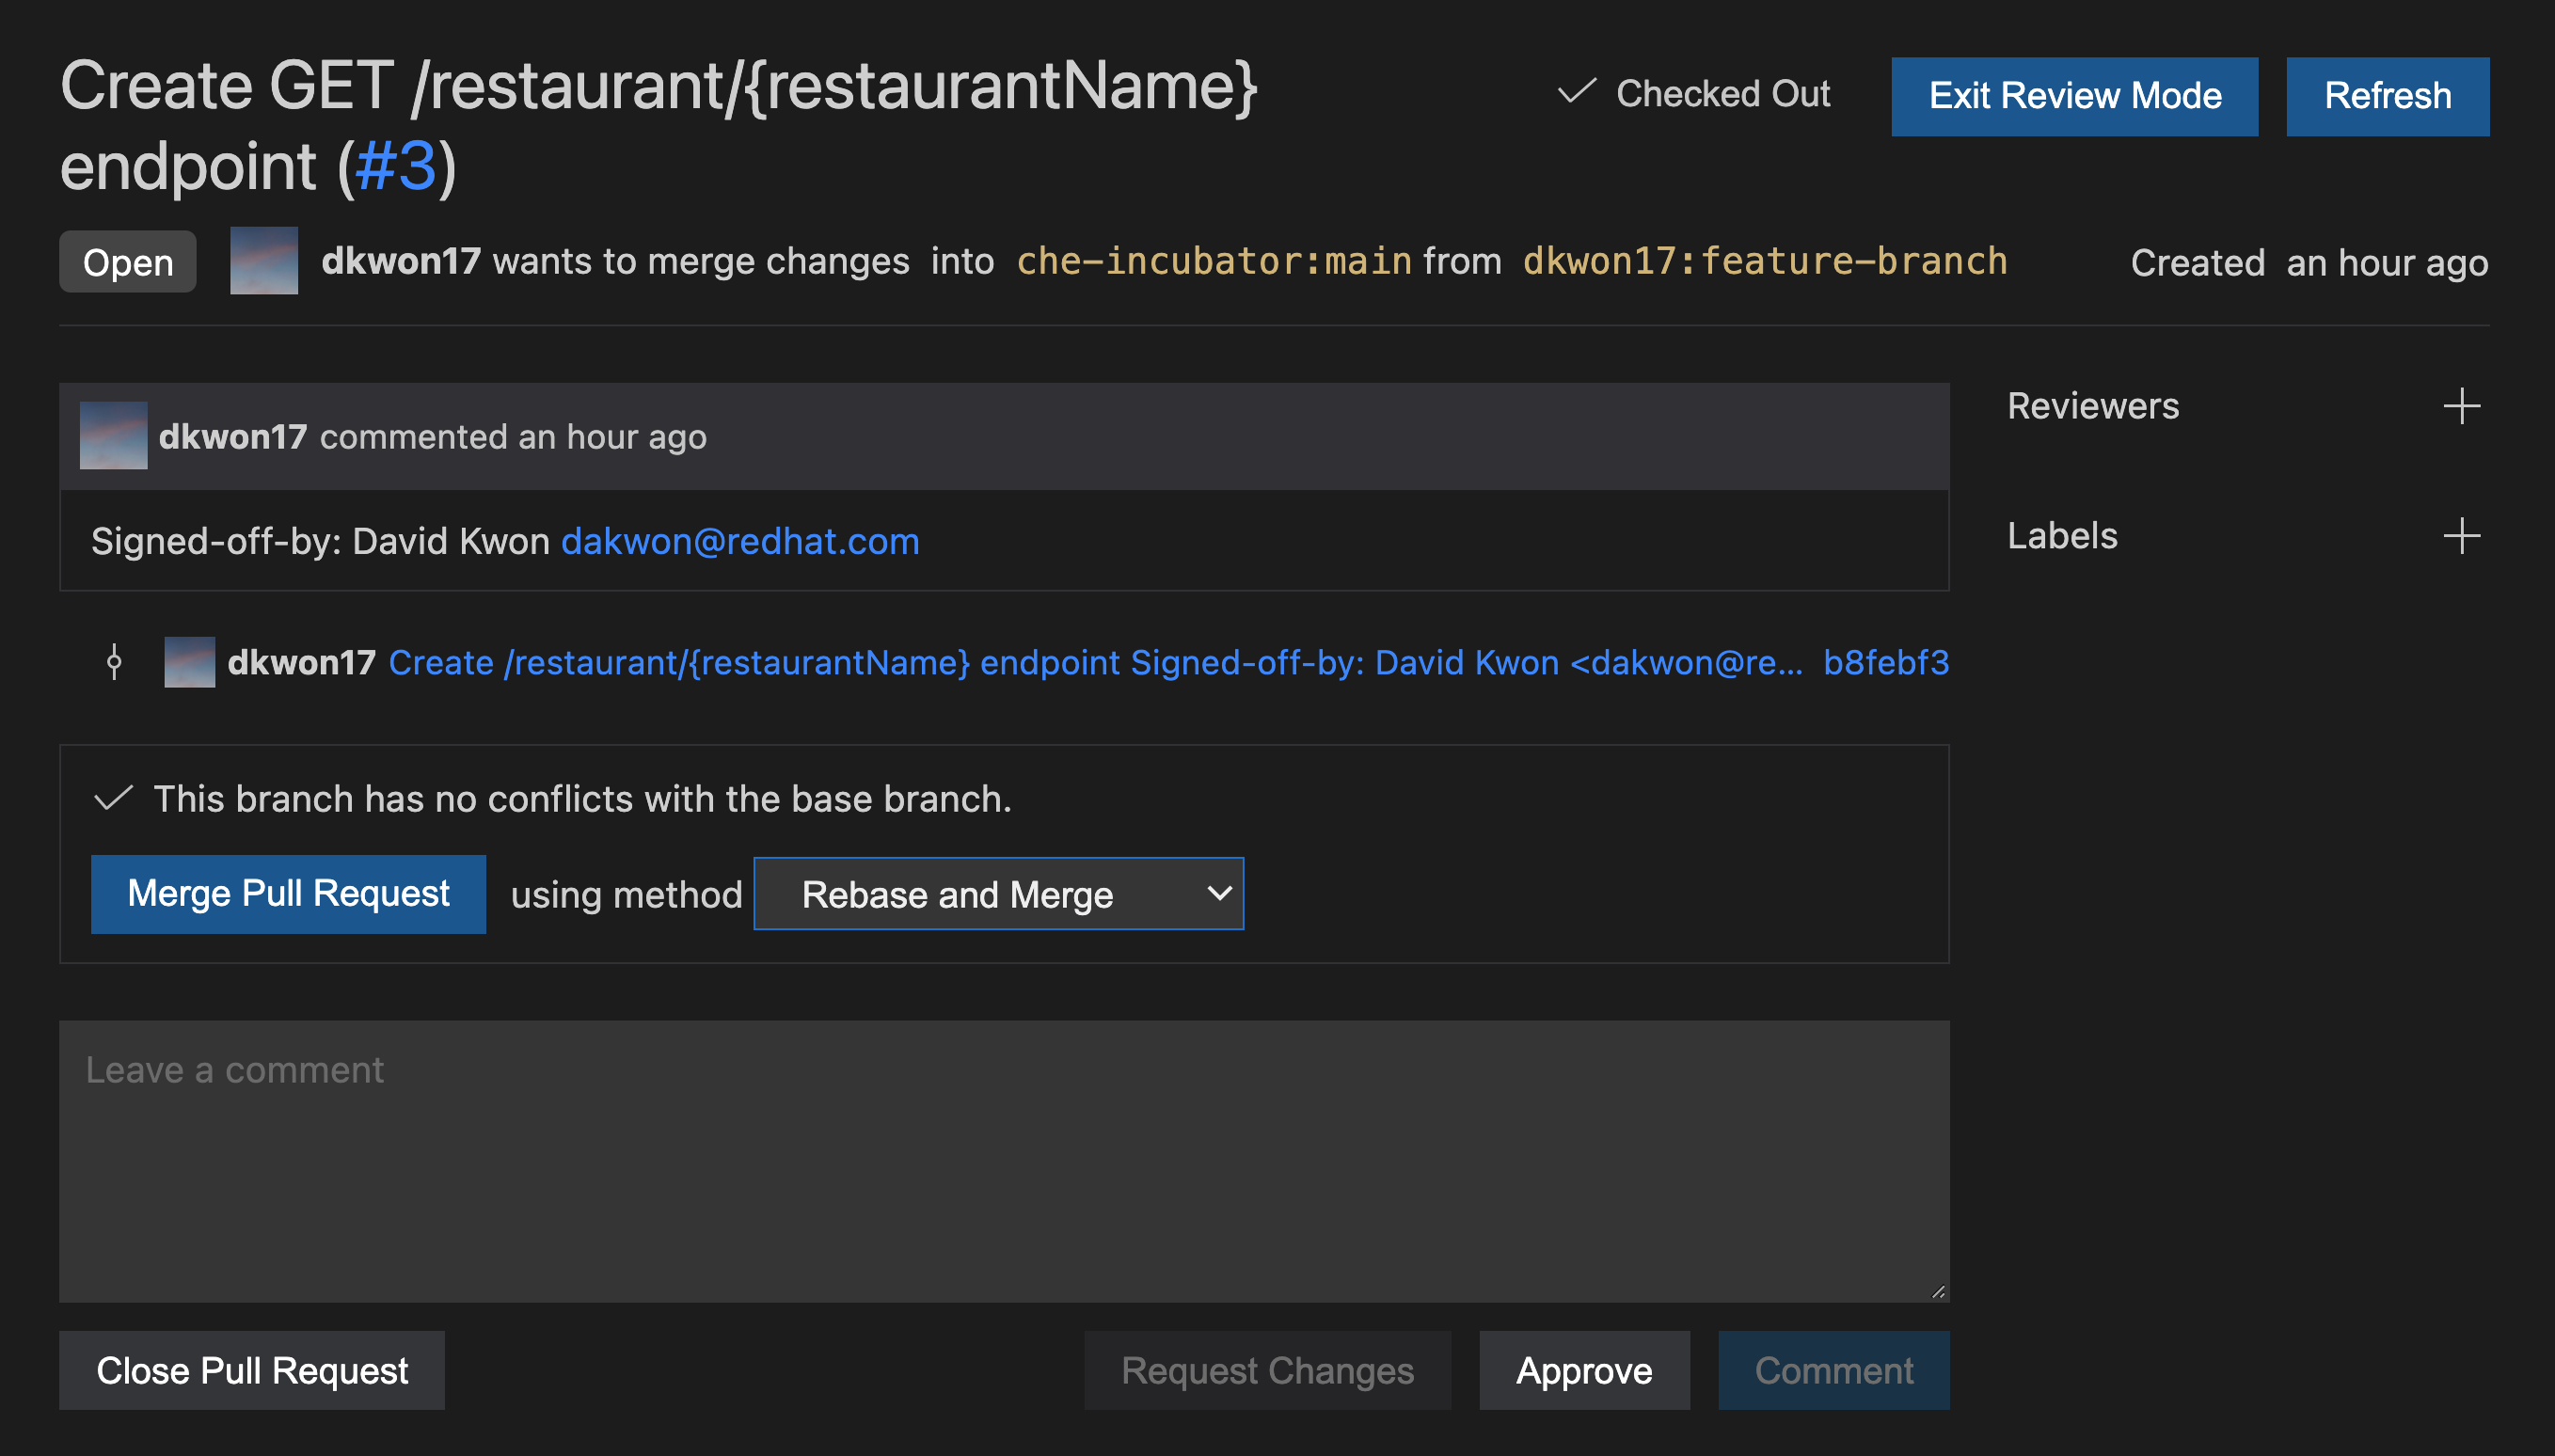
Figure 12: Clicking "Merge Pull Request" to merge.
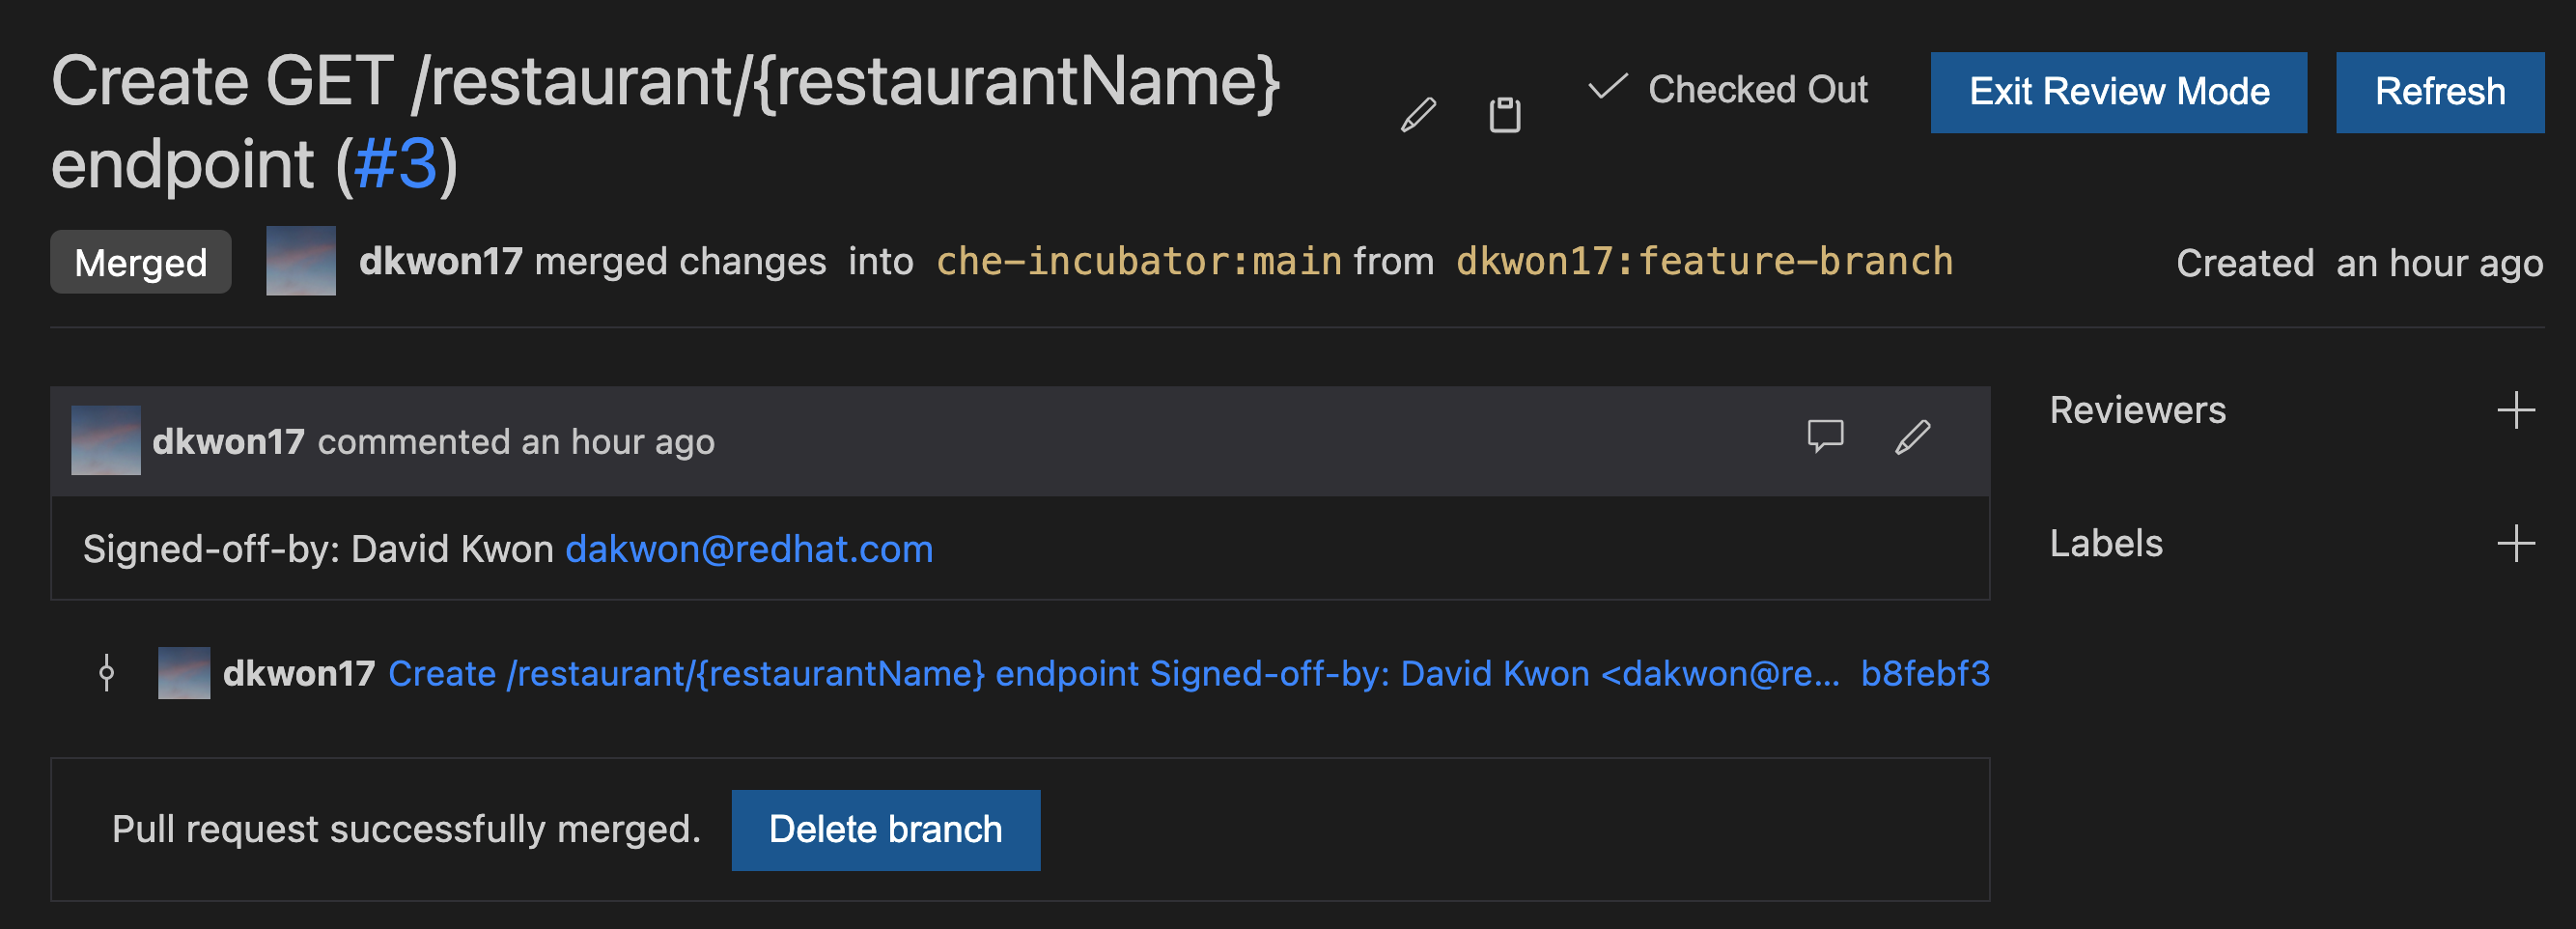
Figure 13: PR has been merged.
Conclusion
You have finished reviewing the PR and have successfully merged it from the web IDE editor. In summary, we have:
-
Opened a new Eclipse Che workspace to review the PR
-
Checked out the feature branch
-
Ran the unit tests
-
Built the application
-
Ran the application in development mode to verify that the feature works as intended
-
Used the GitHub Pull Requests and Issues extension and the Language support for Java ™ extension
-
Merged the PR from the web IDE
without any prior setup on your local machine.
Thank you for reading!